Grandpa’s Secret to the Ultimate Juicy Burger Patty
There is an unspoken magic to a backyard barbecue. The gentle hiss of charcoal catching spark, the sweet aroma of cherry wood smoke drifting through the summer air, and the anticipation of that first, perfect bite of a grilled burger. Yet, all too often, our high expectations are met with disappointing reality: dry, crumbly, tasteless patties that require a lake of ketchup just to slide down your throat. If you have ever wondered why restaurant burgers taste so monumentally better than home-cooked ones, you are not alone. For decades, home cooks have chased the elusive key to the perfect burger.
The answer does not lie in expensive kitchen gadgets, exotic meats, or overly complicated spice rubs. Instead, it lives in a simple, multi-generational technique passed down from my grandfather to my father, and eventually to me. This culinary secret changes everything you know about grinding, shaping, and cooking ground beef. By understanding the food science behind meat proteins and implementing one surprisingly simple kitchen ingredient, you can transform ordinary ground beef into an extraordinary, melt-in-your-mouth masterpiece. In this comprehensive guide, we will pull back the curtain on Grandpa’s legendary burger patty secret, detailing every step, scientific reaction, and culinary technique required to master the art of the homemade burger.
The Food Science of the Perfect Burger Patty
Before we dive into Grandpa’s secret ingredient, we must understand the core anatomy of ground beef. Cooking is not merely an art; it is a series of chemical reactions. When you apply heat to meat, you alter its cellular structure, fat content, and moisture levels. Understanding how these elements interact is the first step toward backyard barbecue mastery.
The Crucial Lean-to-Fat Ratio
If you purchase 90/10 lean ground beef for your burgers, you are setting yourself up for failure from the very beginning. Fat is not an enemy to be avoided; it is the primary source of flavor, tenderness, and juiciness in a burger patty. When fat melts during the cooking process, it lubricates the muscle fibers of the beef, preventing them from tightening into a tough, dry knot.
The golden standard for a truly magnificent burger patty is an 80/20 lean-to-fat ratio. This ratio provides enough fat to baste the meat from the inside out as it cooks, while retaining enough lean muscle structure to prevent the patty from shrinking into a sad, greasy puddle. If you can find a 75/25 blend, it can work wonderfully for flat-top smash burgers, but for a classic, thick-cut backyard burger, 80/20 is the absolute sweet spot.
The Magic of the Custom Beef Blend
While standard ground chuck from the grocery store will produce a decent burger, blending different cuts of beef can elevate your burger patty to a Michelin-star level. If you want to take your cooking to the next level, ask your local butcher to custom-grind a blend of the following three cuts:
- Chuck (60%): Cut from the shoulder, chuck is the ultimate backbone of any great burger. It has a rich, deep beef flavor and naturally possesses an ideal fat-to-lean balance.
- Brisket (20%): Brisket offers a distinctively buttery texture and high concentration of oleic acid, which melts at a lower temperature, creating a luxurious mouthfeel.
- Short Rib (20%): Short rib brings an intense, earthy, and sweet beefiness to the mix, along with beautifully marbled fat that keeps the patty exceptionally moist.
Why Cold Temperatures Matter
One of the most common mistakes home cooks make is letting their ground beef sit out on the counter to reach room temperature before shaping or cooking. While this is an excellent practice for thick ribeye steaks, it is catastrophic for burger patties.
Ground beef contains delicate pockets of fat. If these fats warm up to room temperature, they begin to soften and liquefy. When you shape warm ground beef with your hands, the friction and body heat melt the fat, causing it to smear and bind prematurely with the lean meat proteins. This creates an emulsified, sausage-like texture that makes your finished burger dense, rubbery, and dry. You must keep your meat, bowls, and hands as cold as possible throughout the entire preparation process to preserve the distinct structural integrity of the fat and lean beef particles.
Revealed: Grandpa’s Secret to Unmatched Juiciness
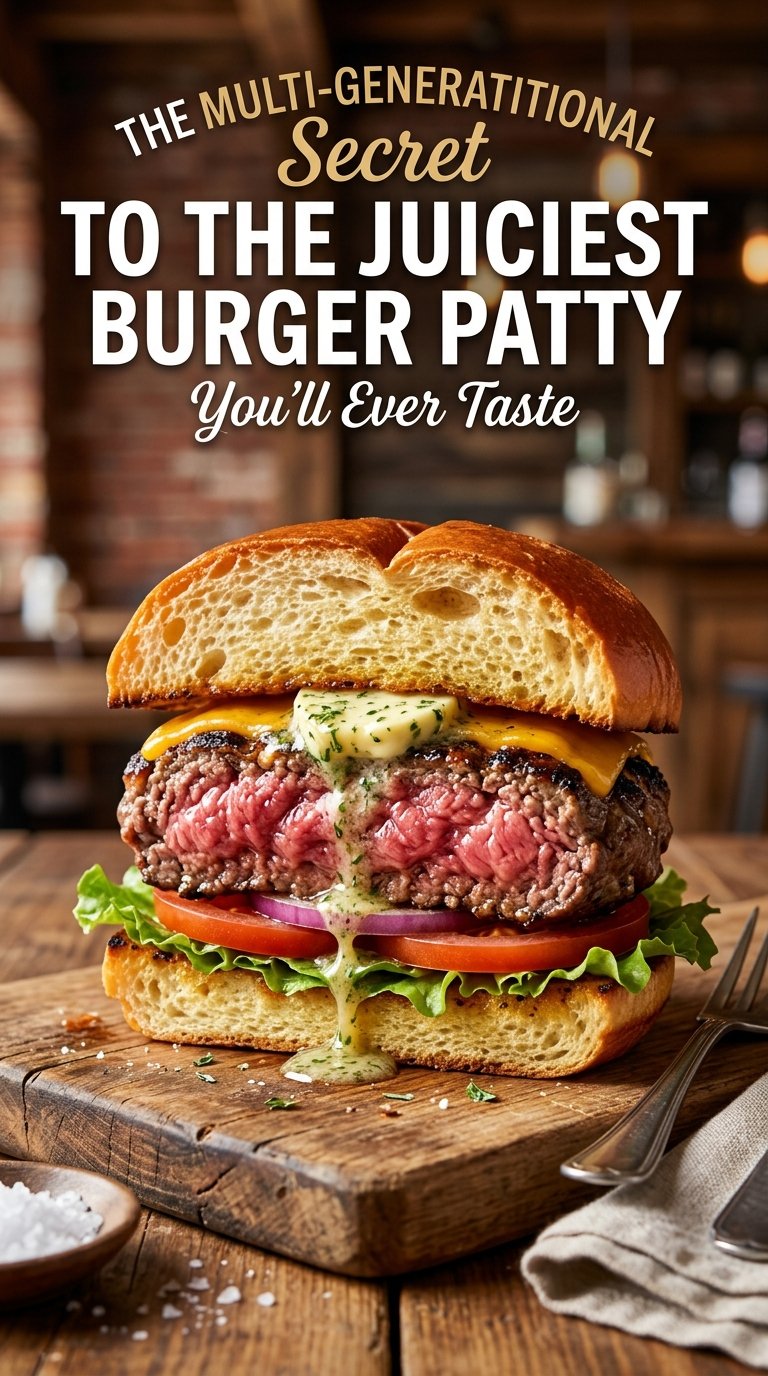
Now, let us discuss the secret technique that my grandfather discovered decades ago—a trick that my dad still uses to this day to leave dinner guests absolutely speechless. The secret to making a burger patty that bursts with juice with every single bite is frozen, grated high-fat butter folded gently into the cold ground beef just before shaping.
The Science Behind the Butter Trick
You might wonder: why add butter to beef when it already contains beef fat? The answer lies in the differences between dairy fat and beef fat, as well as the unique physical structure of frozen butter.
Butter is an emulsion of approximately 80% butterfat, 16-18% water, and 1-2% milk solids. When you grate frozen butter on a box grater, you create tiny, solid curls of cold dairy fat. When these frozen curls are gently folded into cold ground beef, they remain suspended as distinct, isolated pockets of fat throughout the meat matrix.
As the burger patty hits the hot grill or cast-iron skillet, two beautiful things happen simultaneously:
- The Steam Effect: The water trapped within the frozen butter curls instantly vaporizes into steam. As this steam expands, it creates micro-pockets of space within the tightening beef proteins, preventing the patty from becoming overly dense and maintaining a tender, delicate texture.
- The Self-Basting Effect: The rich butterfat melts into the surrounding beef fibers, essentially basting the meat from the inside out. Since dairy fat melts at a lower temperature than beef fat, it creates a luscious, velvety coating over the meat proteins before they have a chance to dry out from the heat.
The result is a burger patty that is unbelievably tender, bursting with rich, buttery juices, and possesses a depth of flavor that standard beef alone simply cannot match.
The Secondary Secret: The Umami Booster
Grandpa did not stop at grated butter. He understood that to make a truly legendary burger, you must maximize the five basic tastes: sweet, sour, salty, bitter, and umami. Umami is the deep, savory, meaty sensation that makes your mouth water.
To skyrocket the natural umami of the beef, Grandpa added a tiny splash of two liquid gold ingredients to his burger mixture: Worcestershire sauce and high-quality soy sauce. These ingredients are packed with naturally occurring glutamates, which bond with the sodium and proteins in the beef, amplifying the perceived meatiness of the burger without making it taste like soy or Worcestershire sauce. It acts as an invisible flavor enhancer that leaves your guests wondering why your beef tastes so incredibly rich.
The Master Blueprint: Grandpa’s Secret Burger Recipe
Now that you understand the science and the secrets, let us walk through the exact, step-by-step recipe to create these legendary patties in your own kitchen. This recipe makes four generous, 6-ounce burger patties.
Ingredients List
- 1.5 pounds (24 oz) cold, freshly ground beef (preferably an 80/20 chuck, brisket, and short rib blend)
- 3 tablespoons high-quality unsalted butter (frozen solid)
- 1 tablespoon Worcestershire sauce (chilled)
- 1 teaspoon dark soy sauce (chilled)
- 1.5 teaspoons coarse kosher salt (for exterior seasoning only)
- 1 teaspoon freshly cracked black pepper (coarse grind)
- 1/2 teaspoon garlic powder
- 4 high-quality brioche or potato buns
- 2 tablespoons melted butter (for toasting the buns)
Step-by-Step Instructions
Step 1: Prep Your Equipment and Ingredients
Before you touch the meat, place a large glass or metal mixing bowl in your freezer for 10 to 15 minutes. Cold bowls prevent the beef fat from melting during the mixing process. Ensure your Worcestershire and soy sauces are chilled in the refrigerator, and your butter is frozen solid.
Step 2: Grate the Secret Ingredient
Remove your frozen butter from the freezer. Using the coarse side of a standard box grater, quickly grate 3 tablespoons of the butter. You want beautiful, light curls of butter. Work quickly so your hands do not melt the dairy fat. Once grated, place the butter curls back into the freezer immediately to keep them rock-solid.
Step 3: The Gentle Mix
Take your chilled mixing bowl from the freezer. Add the cold ground beef to the bowl. Drizzle the chilled Worcestershire sauce and dark soy sauce evenly over the meat. Next, retrieve your frozen grated butter from the freezer and scatter it across the beef.
Using cold hands, gently fold the ingredients together. Do not squeeze, knead, or mash the meat. Treat the beef like a delicate cake batter. You only want to distribute the butter and sauces evenly throughout the meat. Overworking the beef will develop the myosin proteins, turning your tender burger patty into a tough, bouncy meatball. Stop mixing the second the ingredients are evenly distributed—this should take no more than 30 to 45 seconds.
Step 4: Portioning and Shaping
Divide the mixture into four equal portions, weighing approximately 6 ounces each. Wet your hands slightly with cold water to prevent the meat from sticking to them.
Gently shape each portion into a round ball, then lightly press it down onto a parchment-lined baking sheet to form a flat disc. Your patties should be roughly 4.5 inches in diameter and about 3/4-inch thick. Keep in mind that burger patties will shrink in diameter and expand in thickness as they cook, so shape them slightly wider than your burger buns.
Step 5: The “Dimple” Trick
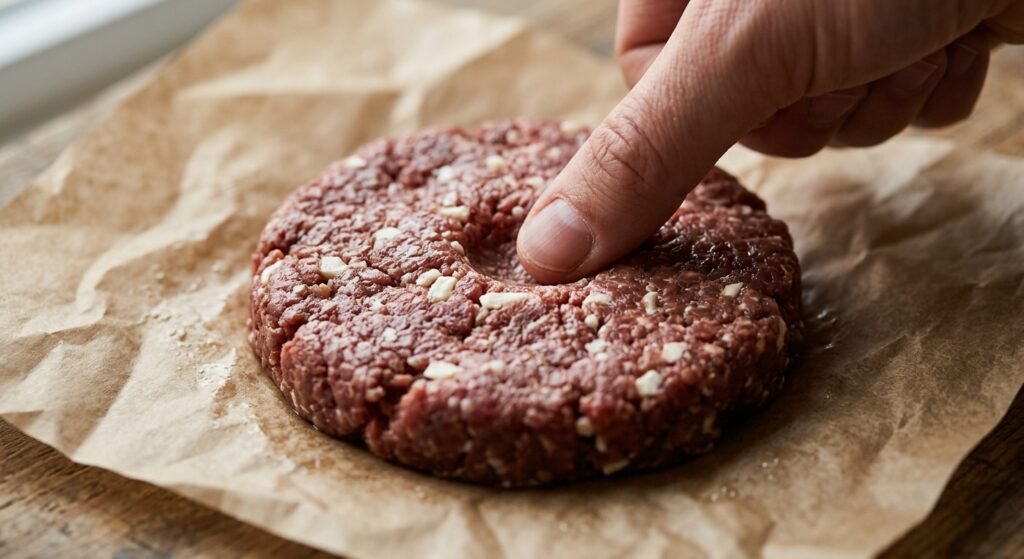
As beef cooks, the proteins on the outer edges contract and pull inward, forcing the juices and meat toward the center. This causes the middle of the patty to puff up, turning your flat burger into a spherical football shape that is impossible to pile toppings onto.
To combat this natural physical phenomenon, use your thumb or the back of a spoon to press a shallow, 1-inch wide dimple into the center of each raw patty. This indentation should be about 1/4-inch deep. As the burger cooks and expands, the dimple will rise, leaving you with a perfectly flat, level burger patty that is easy to stack with cheese, lettuce, and tomatoes.
Step 6: The Final Chill
Place your shaped patties, still on the parchment-lined baking sheet, back into the refrigerator for at least 30 minutes before cooking. This resting period is critical. It allows the beef proteins to relax, firms up the grated butter, and ensures the patty holds its shape perfectly when it hits the hot cooking surface.
The Battle of Cooking Methods: Grill vs. Cast Iron
There is an ongoing, passionate debate in the culinary world: should a burger be cooked over open flames on a grill, or seared to crusty perfection in a cast-iron skillet? Both methods have unique benefits, and Grandpa’s secret burger patty thrives under both conditions. Let us examine how to execute both techniques flawlessly.
Method A: The Cast-Iron Skillet (The Ultimate Crust)
If your goal is to maximize the Maillard reaction—the chemical reaction between amino acids and reducing sugars that gives browned food its desirable flavor—cast iron is your best friend. A heavy cast-iron skillet provides superior heat retention and direct surface contact, creating an even, deep-brown, caramelized crust across the entire surface of the patty.
- Heat the Pan: Place your cast-iron skillet over medium-high heat until it is smoking hot. Do not add oil to the pan; our patties already contain plenty of fat that will render out instantly.
- Season the Patties: Just before the patties hit the pan, season both sides generously with coarse kosher salt, black pepper, and garlic powder. Never salt your beef beforehand, as salt draws out moisture and dissolves the proteins, leading to a tough texture if done too early.
- The Sear: Lay the cold patties into the hot skillet, dimple-side up. You should hear an immediate, aggressive sizzle. Cook undisturbed for 3 to 4 minutes. Do not move, touch, or press down on the patties. We want to build a deep, caramelized crust.
- The Flip: Slide a sturdy metal spatula underneath the patty, ensuring you scrape up the entire caramelized crust, and flip. Cook for another 3 minutes.
- The Cheese Melt: If you are making a cheeseburger, add your cheese immediately after flipping. Place a heatproof metal bowl or lid over the skillet for the final 60 seconds of cooking. This traps the steam, melting the cheese into a beautiful, molten blanket.
Method B: The Backyard Grill (The Classic Smokey Flavor)
Grilling over charcoal or wood provides a distinct, rustic, smokey aroma that is impossible to replicate indoors. The melting fat and butter from Grandpa’s patties will drip onto the hot coals, vaporizing into flavorful smoke that seasons the meat as it cooks.
- Create Two-Zone Heat: Set up your grill for two-zone cooking. Pile your hot charcoal on one side of the grill (the direct, high-heat zone) and leave the other side empty (the indirect, low-heat zone).
- Clean and Oil the Grates: Ensure your grill grates are scrubbed clean. Wipe them down with an oil-soaked paper towel using tongs to prevent the meat from sticking.
- Season and Sear: Season your cold patties generously with your salt, pepper, and garlic powder mix right before they go on the grill. Place the patties directly over the hot coals (direct heat). Sear for 3 minutes per side. Watch out for flare-ups; if the dripping butter causes the flames to kiss the meat too aggressively, gently slide the patties to the cooler side of the grill temporarily.
- Indirect Finish: If your patties are thick and need a bit more time to reach your desired doneness, move them to the indirect heat zone, close the grill lid, and let them finish cooking gently for another 1 to 2 minutes.
The Essential Temperature Guide for Burgers
Do not guess when your burgers are done. Poking a burger with your finger or, even worse, cutting it open to check the color will release all of those precious, hard-earned juices. Instead, invest in a high-quality, instant-read digital meat thermometer.
Insert the thermometer probe horizontally into the thickest part of the patty to get an accurate reading. Refer to this handy temperature guide to cook your burger exactly to your liking:
| Doneness | Pull Temperature | Final Temp (After Rest) | Interior Appearance |
|---|---|---|---|
| Rare | 120°F (49°C) | 125°F (52°C) | Cool, bright red center |
| Medium-Rare | 130°F (54°C) | 135°F (57°C) | Warm, rich pink center (Recommended) |
| Medium | 140°F (60°C) | 145°F (63°C) | Mostly pink throughout |
| Medium-Well | 150°F (66°C) | 155°F (68°C) | Slight hint of pink in the center |
| Well-Done | 160°F (71°C) | 165°F (74°C) | Solid brown throughout, no pink |
Note: The USDA recommends cooking ground beef to a minimum internal temperature of 160°F (71°C) to ensure safety. However, if you source high-quality, freshly ground beef from a trusted butcher, cooking to medium-rare or medium yields a significantly juicier, more tender culinary experience. Always prioritize food safety and make informed decisions based on the source of your meat.
Critical Mistakes to Avoid at All Costs
Even with Grandpa’s secret butter trick up your sleeve, small technical errors can quickly derail your efforts. To ensure your burgers turn out perfectly every time, avoid these common backyard cooking pitfalls:
1. Pressing the Patty with a Spatula
We have all seen it: a backyard griller standing over the hot coals, spatula in hand, pressing down on the cooking burger patties with all their might. This action is met with an impressive hiss and a dramatic burst of flames.
Stop doing this immediately. That hiss is not the sound of cooking; it is the sound of your burger’s lifeblood—its precious, flavorful juices—being forcefully squeezed out and lost forever into the fiery depths of your grill. The only exception to this rule is during the first 10 seconds of cooking a flat-top smash burger. For a thick, juicy, traditional burger patty, never press down on the meat under any circumstances.
2. Salting the Beef Mixture Internally
It can be tempting to mix salt directly into your raw ground beef along with the butter and sauces. However, sodium chloride is a powerful solvent. When mixed into raw beef, it dissolves the muscle proteins (specifically myosin), causing them to cross-link and bond. This transforms your loose, tender, ground beef structure into a tight, dense, sausage-like texture. For a light, crumbly, melt-in-your-mouth burger, keep all salt on the exterior surfaces only, applying it immediately before the meat touches the hot cooking surface.
3. Over-Handling the Meat
Ground beef is incredibly sensitive to friction and temperature. If you squeeze, knead, or repeatedly roll the meat in your hands, you will melt the delicate fats and overwork the proteins. Treat your burger mixture with absolute tenderness. Work quickly, keep everything cold, and mix only until the ingredients are barely combined.
4. Using Cheap, Untoasted Buns
The bun is not merely a vehicle for holding the meat; it is a fundamental component of the overall flavor and structural experience of a burger. A dry, cold, untoasted bun will quickly absorb the juices from your patty, becoming soggy, structurally compromised, and falling apart in your hands.
Always toast your buns. Brush the cut sides of your brioche or potato buns with melted butter or a thin layer of mayonnaise, and place them face-down on a medium-hot skillet or grill grates for 1 to 2 minutes until they are golden brown and crispy. The toasted layer acts as a delicious, caramelized, hydrophobic shield, preventing the meat juices from making the bun soggy while providing a delightful textural contrast.
Grandpa’s Ultimate Burger Sauce and Assembly
A masterpiece of a burger patty deserves to be surrounded by components of equal caliber. Let us round out the culinary experience with Grandpa’s signature burger sauce and the correct order of assembly to maintain structural integrity.
The Legendary Secret Burger Sauce
This sauce is the perfect balance of creamy, tangy, sweet, and savory, designed to cut through the rich, buttery profile of our secret burger patty.
- 1/2 cup high-quality mayonnaise (such as Duke’s or Hellmann’s)
- 2 tablespoons sweet pickle relish
- 2 tablespoons yellow mustard
- 1 tablespoon ketchup
- 1/2 teaspoon white vinegar
- 1/2 teaspoon smoked paprika
- 1/4 teaspoon onion powder
- 1/4 teaspoon garlic powder
Whisk all ingredients together in a small bowl, cover, and let rest in the refrigerator for at least 30 minutes before serving to allow the flavors to meld beautifully.
The Scientific Order of Assembly
The order in which you stack your burger matters. Improper assembly leads to sliding ingredients, soggy bottom buns, and a messy dining experience. Follow this proven construction blueprint:
- Bottom Bun (Toasted): The sturdy base of our creation.
- Secret Burger Sauce: A thin layer on the bottom bun acts as a barrier against moisture.
- Shredded Crisp Lettuce: Shredded iceberg or butter lettuce provides crunch and catches any dripping juices.
- The Secret Patty (with Melted Cheese): Place your hot, cheese-blanketed masterpiece on top of the lettuce.
- Thinly Sliced Red Onion: Place onions directly on the hot cheese to slightly soften them and release their sweetness.
- Slices of Ripe Tomato: Season your tomato slices with a tiny pinch of salt and pepper to unlock their full flavor potential.
- Pickles: Lay pickle chips on top of the tomato.
- Top Bun (Toasted with Sauce): Spread another generous layer of secret sauce on the top bun before completing the burger.
Frequently Asked Questions (FAQ)
Can I use this secret butter trick with ground turkey or chicken?
Absolutely! In fact, the frozen butter trick is even more transformative for lean meats like ground turkey or chicken. Because poultry has a much lower fat content than beef, it is notoriously prone to drying out. Adding frozen, grated butter to ground turkey or chicken patties introduces critical moisture and fat, resulting in incredibly juicy poultry burgers that rival beef in flavor and texture.
What is the best cheese for a homemade burger?
The best cheese is one that melts exceptionally well. High-quality American cheese remains the gold standard for classic burgers because of its unparalleled melting capabilities. However, if you prefer a sharper flavor profile, medium cheddar, Monterey Jack, Gouda, or Gruyere are fantastic options. To help firmer cheeses melt, place a lid or a metal bowl over your cooking pan or grill grate to trap steam.
Can I prepare these patties a day in advance?
Yes, you can shape the patties, wrap them tightly in plastic wrap, and keep them in the refrigerator for up to 24 hours before cooking. In fact, resting in the fridge helps the meat relax and allows the grated butter to remain perfectly solid, ensuring an exceptionally juicy result when cooked. Do not season them with salt until right before they hit the heat.
What can I use instead of soy sauce if I have a soy allergy?
If you have a soy allergy, you can substitute the soy sauce with coconut aminos, liquid aminos, or simply double the amount of Worcestershire sauce. The goal of this ingredient is to introduce deep umami flavor (glutamates), which can also be achieved by adding a teaspoon of mushroom powder or a splash of fish sauce to the beef mixture.
Why does my burger shrink so much when I cook it?
Burger shrinkage is caused by the contraction of meat proteins and the rendering of fat and water as the meat heats up. To minimize shrinkage, use an 80/20 lean-to-fat ratio (higher fat content causes more shrinkage as the fat renders out), make your raw patties slightly wider than your burger buns, and use the “dimple” technique to prevent the patty from ballooning in the center.
Conclusion: The Legacy Lives On
Cooking is more than just sustaining ourselves; it is a profound way to connect with our past, share stories, and bring joy to those we care about. This secret burger patty technique, passed down from my grandfather to my father, and now to you, is proof that greatness lies in the details. By respecting the food science of ground beef, treating your ingredients with care, and incorporating the simple magic of frozen grated butter, you are no longer just cooking a meal—you are crafting an unforgettable culinary experience.
The next time you fire up your grill or heat up your cast-iron skillet, remember Grandpa’s advice: keep it cold, mix it gently, season the outside, and let the butter do the heavy lifting. Your family, your friends, and your tastebuds will thank you. Happy cooking!