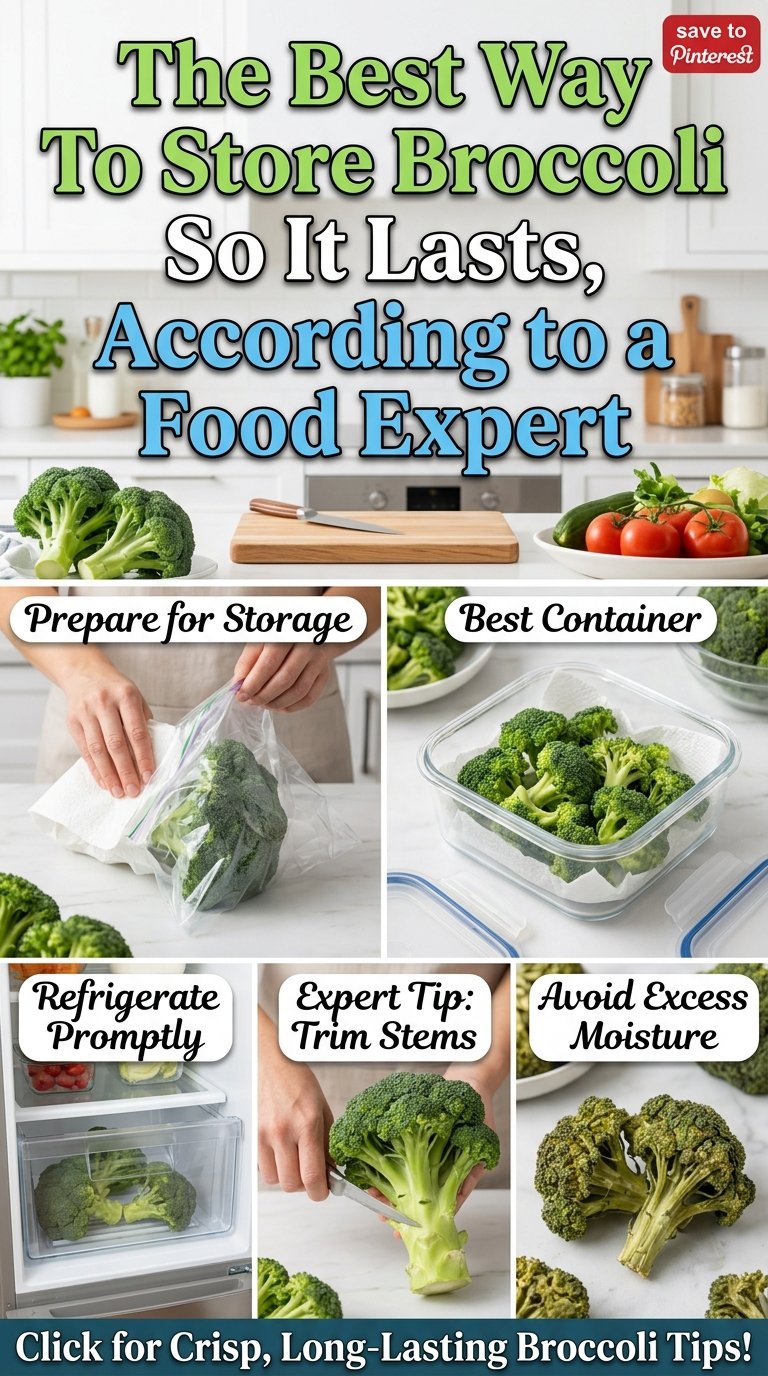
Keep Broccoli Fresh: Stop Rotting Instantly!
We have all been there: you head to the grocery store with the best of intentions, loading your cart with vibrant, healthy vegetables. You buy a beautiful, deep green head of broccoli, planning to toss it into a stir-fry, roast it to caramelized perfection, or steam it for a healthy side dish. But life gets busy. A few days pass, and when you finally open your refrigerator’s crisper drawer, you are met with a disappointing sight. That once-firm crown has turned a sad, sickly yellow, the stems are limp and rubbery, and a distinct, sulfur-like odor tells you that rot has already set in.
Broccoli is one of the most popular and nutrient-dense cruciferous vegetables in the world, packed with vitamins A, C, and K, as well as dietary fiber and powerful antioxidants. However, it is also notoriously delicate. Because of its unique structure and high respiration rate, broccoli can go from crisp and perfect to slimy and inedible in a matter of days if stored incorrectly.
Fortunately, food waste does not have to be an inevitable part of your weekly routine. In this ultimate guide, you will learn how to store broccoli like an expert to maximize its shelf life, keep it incredibly crisp, and prevent broccoli from rotting. We will dive deep into the science of produce preservation, compare the best storage methods step-by-step, teach you how to freeze broccoli for the long term, and share an absolute game-changing kitchen hack to revive limp broccoli that has lost its crunch. Let’s dive in and save your produce!
—
The Science of Spoilage: Why Broccoli Rots So Quickly
To understand how to keep broccoli fresh, we first need to look at what happens to this vegetable after it is harvested. Broccoli is not a single solid vegetable like a carrot or a potato; instead, a head of broccoli is actually a cluster of hundreds of immature flower buds (called florets) attached to a thick, fibrous stem. Because it consists of living, breathing flower buds, its cellular activity remains incredibly high even after it is cut from the field.
1. High Respiration Rate
Once harvested, broccoli continues to “breathe” through a process called respiration. During respiration, the plant consumes its own stored sugars and oxygen to produce carbon dioxide, water, and heat. Because broccoli has a much higher respiration rate than harder root vegetables, it burns through its energy reserves rapidly. This metabolic process causes the cells to break down, leading to moisture loss, yellowing, and eventually, structural collapse.
2. Ethylene Gas Sensitivity
Broccoli is highly sensitive to ethylene, a natural plant hormone released in the form of a gas by certain ripening fruits and vegetables (such as apples, bananas, avocados, and tomatoes). Exposure to even trace amounts of ethylene gas accelerates the aging process in broccoli. It triggers the breakdown of chlorophyll—the pigment that gives broccoli its beautiful green color—causing the buds to turn yellow and open into tiny yellow flowers. Along with this color change, the texture becomes tough, woody, and bitter.
3. Moisture: The Double-Edged Sword
Broccoli needs humidity to keep its cells hydrated and turgid (firm). However, excessive, stagnant liquid water is the ultimate enemy of storing fresh broccoli. If water pools between the tight florets, it creates the perfect breeding ground for bacteria, mold, and yeast. Without proper airflow, these pathogens quickly multiply, leading to black spots, mushiness, and a pungent, rotten smell. Finding the perfect balance between high humidity and adequate air circulation is the secret to successful storage.
—
How to Select the Freshest Broccoli at the Store
The key to successful long-term storage begins long before you put the vegetable in your refrigerator. If you buy broccoli that is already on the verge of decline, even the best storage methods will only buy you an extra day or two. When you are at the grocery store or farmers’ market, use your senses to inspect the produce and choose the healthiest specimens.
- Color Check: Look for heads that are a deep, vibrant green, sometimes with a subtle purplish or blue-green cast. Avoid any crowns that show signs of yellowing, as this indicates the broccoli is already aging and will spoil rapidly.
- Floret Tightness: Examine the individual buds (called the beads). They should be tightly closed and compacted together in a dense, firm dome. If the florets look loose, spread out, or appear to be opening, the broccoli is past its peak freshness.
- Stalk Firmness: Give the stem or stalk a gentle squeeze. It should feel completely solid and rigid. Avoid stems that feel woody, hollow, bendable, or rubbery.
- The Smell Test: Fresh broccoli should have a mild, clean, earthy scent. If you detect a strong, sulfurous, or sour odor, walk away.
- No Wet Spots: Inspect the crown for any dark, mushy, or water-logged spots. These are early signs of bacterial soft rot, which will quickly consume the entire head once you get it home.
—
How to Store Broccoli: The 4 Best Methods Ranked
Now that you have selected the perfect head of broccoli, let’s explore the absolute best ways to store it at home. We have tested and ranked the most popular kitchen methods based on how effectively they maintain moisture balance, control ethylene exposure, and prevent rot.
Method 1: The “Bouquet” Method (Ranked #1 for Longevity)
This is the gold standard of broccoli storage. Think of fresh broccoli as a bunch of fresh-cut flowers. By keeping the stem hydrated while allowing the florets to breathe, you can easily keep broccoli fresh and crisp for up to 10 to 14 days.
What You Need:
- A clean glass jar, heavy glass, or small vase
- Fresh, cold tap water
- A clean, loose-fitting plastic produce bag
Step-by-Step Instructions:
- Do not wash the broccoli before starting this process. Introducing excess water to the florets now will cause rapid decay.
- Fill your glass jar with about 1 to 2 inches of cold water.
- Place the stem of the broccoli head directly into the water. The florets should sit completely above the rim of the jar, with only the bottom of the stalk submerged.
- Take a clean plastic produce bag and drape it loosely over the top of the broccoli crown. Do not tie or seal the bag; it should act as a loose canopy to trap humidity around the buds while still allowing vital air circulation.
- Place the entire setup (jar, broccoli, and loose bag) inside your refrigerator.
- For the best results, change the water in the jar every 2 days to prevent bacterial growth in the water.
Why It Works: The cut stem absorbs moisture to keep the plant cells fully hydrated, while the loose plastic cover maintains a humid microclimate around the buds without trapping ethylene gas or stagnant moisture.
Method 2: The Damp Paper Towel Wrap (Ranked #2 for Ease)
If you do not have enough vertical shelf space in your refrigerator to store a jar of broccoli upright, the damp paper towel wrap is your next best option. This method provides consistent humidity directly to the vegetable while absorbing excess moisture that could trigger mold.
What You Need:
- 1 or 2 clean paper towels
- A clean spray bottle with cold water (or a kitchen sink)
- A loose plastic bag or a reusable silicone storage bag (kept unzipped)
Step-by-Step Instructions:
- Take your paper towels and mist them lightly with cold water. They should be damp, not dripping wet. If they are too wet, wring them out thoroughly.
- Gently wrap the damp paper towels around the entire head of the broccoli, covering both the crown and the stem.
- Place the wrapped broccoli inside a clean plastic bag.
- Keep the opening of the bag loosely open or unzipped. Do not seal the bag. This allows respiratory gases to escape while keeping the humidity level high.
- Place the bag in your refrigerator’s vegetable crisper drawer.
Why It Works: The damp paper towel acts as a moisture reservoir, slowly releasing humidity to keep the broccoli crisp, while the paper fibers absorb any heavy droplets of water that could cause slimy rotting spots.
Method 3: The Perforated Plastic Bag (Best for Quick Use)
If you plan to cook your broccoli within 3 to 5 days of buying it, you can use a modified plastic bag method. However, storing broccoli in a standard, tightly sealed plastic bag is a recipe for disaster, as it traps moisture and ethylene gas, causing rapid rot.
What You Need:
- A clean plastic storage bag (like a gallon-sized Ziploc)
- A sharp knife, a pen, or a clean hole puncher
Step-by-Step Instructions:
- Take your plastic bag and puncture it 10 to 15 times with a pen, knife tip, or hole puncher. This creates ventilation holes that allow ethylene gas to escape and fresh air to circulate.
- Slide your dry, unwashed broccoli head into the perforated bag.
- Gently squeeze out excess air and close the bag.
- Store the bag in the crisper drawer of your refrigerator, set to high humidity if your drawer has an adjustable slider.
Why It Works: The perforations balance the environment inside the bag, preventing the air from drying out completely while ensuring that carbon dioxide and ethylene do not build up to toxic levels that ruin the vegetable.
Method 4: Storing Pre-Cut Broccoli Florets
Many busy home cooks prefer to wash, chop, and prep their vegetables ahead of time for easy weeknight meals. While cutting broccoli reduces its overall shelf life (because damaging the plant tissue increases its respiration rate), you can still keep pre-cut florets fresh for 4 to 6 days using the right containment strategy.
What You Need:
- An airtight glass or plastic food storage container
- Several sheets of dry paper towel
Step-by-Step Instructions:
- Cut your broccoli into bite-sized florets and stems.
- If you choose to wash the florets at this stage, you must dry them completely. Use a salad spinner to shake off excess water, then spread them out on a clean kitchen towel for at least 30 minutes until they are bone dry to the touch.
- Line the bottom of your airtight storage container with a dry paper towel.
- Place the dry broccoli florets on top of the paper towel. Do not pack them down too tightly; leave some breathing room.
- Place another dry paper towel directly on top of the florets before sealing the container lid tightly.
- Store the container on a shelf in your refrigerator.
Why It Works: The paper towels absorb any moisture that evaporates from the cut edges of the vegetable, preventing condensation from forming on the lid and dripping back down onto the florets, which would cause mushiness.
—
What NOT to Do: Common Mistakes That Ruin Broccoli
Sometimes, knowing what to avoid is just as important as knowing the correct techniques. Avoid these common storage mistakes to prevent your broccoli from rotting prematurely:
1. Washing Broccoli Before Storage
This is the single most common mistake people make with fresh produce. When you wash broccoli, water gets trapped deep inside the dense network of tiny florets. Because of the tight spacing, this water cannot evaporate easily. When stored in a cold, dark refrigerator, this trapped moisture leads to rapid fungal and bacterial growth. Always wash your broccoli immediately before you cook it, never before you store it.
2. Using Sealed, Non-Ventilated Bags
Placing a head of broccoli in a standard airtight plastic bag or wrapping it tightly in plastic cling wrap traps the moisture and ethylene gas released by the vegetable. This creates a humid, suffocating greenhouse environment that triggers yellowing, mold growth, and a terrible sulfur smell within 48 hours.
3. Storing Broccoli Near Ethylene Producers
Never store your broccoli in the same crisper drawer as apples, pears, peaches, plums, melons, avocados, or tomatoes. The ethylene gas emitted by these fruits will turn your vibrant green broccoli yellow and limp overnight. Keep broccoli in its own separate drawer, or store it far away from these ripening agents.
4. Storing Broccoli at the Back of the Bottom Shelf
The back of the bottom shelf in many refrigerators can drop below freezing temperatures. Because broccoli has a high water content, exposing it to freezing temperatures causes the water inside the plant cells to freeze, expand, and rupture the cell walls. When the temperature fluctuates, the frozen areas thaw, leaving behind a dark, slimy, water-logged patch that rots instantly.
—
How to Freeze Broccoli for Long-Term Storage
If you bought too much broccoli or have a bountiful harvest from your home garden that you cannot consume within two weeks, freezing is an exceptional preservation option. When frozen correctly, broccoli can retain its vibrant green color, nutritional profile, and crisp texture for up to 10 to 12 months.
However, you cannot simply toss raw broccoli into the freezer. Raw vegetables contain active enzymes that cause them to lose their color, flavor, nutrients, and texture over time, even when frozen. To stop these enzymes in their tracks, you must perform a culinary technique called blanching before freezing.
The Ultimate Step-by-Step Blanching and Freezing Guide
Equipment Needed:
- A large pot of water
- A large bowl filled with cold water and ice cubes (an ice bath)
- A colander or slotted spoon
- Clean kitchen towels or paper towels
- A baking sheet (cookie sheet)
- Parchment paper (optional)
- Heavy-duty freezer bags or a vacuum sealer
Step 1: Prep and Cut the Broccoli
Wash the broccoli thoroughly under cold running water to remove any dirt, debris, or insects. Trim away any tough, woody ends from the main stem. Cut the crown into uniform, bite-sized florets, and peel and slice the tender inner stem into rounds. Cutting them to a uniform size ensures they will cook evenly during the blanching process.
Step 2: Boil the Water and Prepare the Ice Bath
Bring your large pot of water to a rolling boil over high heat. While the water is heating up, prepare your ice bath. Fill a large mixing bowl with cold water and plenty of ice cubes. Set it nearby on your kitchen counter.
Step 3: Blanch the Broccoli
Carefully lower the broccoli florets and stem pieces into the boiling water. Once the water returns to a boil, set a timer for exactly 3 minutes. Do not overcook; the goal is to deactivate the aging enzymes, not cook the vegetable through. The broccoli should turn a bright, intense neon-green color.
Step 4: The Cold Shock
As soon as the 3-minute timer rings, immediately scoop the broccoli out of the boiling water using a slotted spoon or drain them into a colander. Plunge the hot broccoli directly into the prepared ice bath. Stir them gently in the icy water. Leave them in the ice bath for exactly 3 minutes (the same amount of time they boiled) to completely stop the cooking process.
Step 5: Dry Thoroughly
Remove the cooled broccoli from the ice bath and drain it well in a colander. Spread the florets out in a single layer on clean kitchen towels or paper towels. Gently pat them dry. This step is critical: any water left on the surface of the broccoli will turn into ice crystals in the freezer, leading to freezer burn and mushiness when thawed.
Step 6: The Flash Freezing Method (Prevent Clumping)
To prevent your frozen broccoli from sticking together in one massive, solid block, you should flash freeze them first. Line a baking sheet with parchment paper. Arrange the dried broccoli pieces on the baking sheet in a single layer, ensuring they do not touch each other. Place the baking sheet flat in your freezer for 1 to 2 hours, or until the individual pieces are frozen solid.
Step 7: Package and Label
Transfer the frozen broccoli pieces into heavy-duty freezer-safe zip bags or vacuum-sealed bags. If using freezer bags, squeeze out as much air as possible before sealing (you can use a straw to suck out the remaining air). Label the bags with the date and contents. Place the bags back into the freezer for long-term storage.
—
How to Tell If Your Broccoli Has Gone Bad
Even with the best efforts, all fresh produce will eventually reach its limit. It is important to know the signs of spoilage so you do not accidentally consume ruined food or throw away perfectly good vegetables prematurely. Inspect your broccoli for the following indicators:
| Symptom | Fresh Broccoli | Spoiled/Rotten Broccoli |
|---|---|---|
| Color | Deep green, bluish-green, or purple-tinted | Dull yellow, pale brown, or displaying black spots |
| Texture | Firm, rigid stem; tight, crisp florets | Limp, rubbery stem; soft, mushy, or slimy florets |
| Odor | Mild, clean, earthy, vegetable scent | Strong, pungent, sour, or sulfurous (rotten egg) smell |
| Mold | None | White, grey, or black fuzzy spots on florets or stem |
If your broccoli only has a few tiny yellow spots but is still firm and smells normal, it is perfectly safe to eat, though it may taste slightly more bitter. However, if the broccoli is slimy, has black spots of mold, or emits a strong odor, it is time to throw it out or compost it.
—
The Magic Kitchen Hack: How to Revive Limp Broccoli
Before you toss a rubbery, bendable head of broccoli into the trash or compost bin, wait! If your broccoli does not show any signs of rot (no bad smell, no mold, no slime, and no severe yellowing) but has simply gone completely limp and soft, you can easily save it.
When broccoli goes limp, it is because it has lost moisture through evaporation, causing the individual cells to lose their internal water pressure (called turgor pressure). Think of it like a deflated balloon. By using simple plant science, we can rehydrate the cell walls and make the vegetable incredibly crisp and crunchy again.
The Ice Bath Hydration Method
What You Need:
- Your limp, bendable broccoli
- A sharp chef’s knife
- A large bowl filled with ice-cold water and ice cubes
- About 15 to 30 minutes of time
Step-by-Step Instructions:
- Take your limp broccoli and look at the very bottom of the main stalk. The end is likely dry, brown, and sealed shut.
- Using a sharp knife, trim off about 1/2 inch to 1 inch from the bottom of the stem. This cuts away the dried-out, scabbed tissue and exposes the fresh vascular bundles (the plant’s internal water-transportation system).
- Immediately submerge the trimmed stem end directly into your bowl of ice water. If the entire head is limp, you can submerge the whole broccoli head completely in the ice bath.
- Leave the broccoli in the ice-cold water for 15 to 30 minutes.
- Take the broccoli out and dry it. You will be amazed to find that the stem is once again rock-solid, and the florets have regained their tight, snappy, crisp texture!
The Science Behind It: Through a process called osmosis, the thirsty, dehydrated cells of the freshly cut stem draw up the ice-cold water like a straw. This refills the plant’s vacuoles, restoring turgor pressure against the cell walls and making the entire vegetable firm and crunchy again.
—
Creative Ways to Use Older Broccoli Stems and Crowns
If you have broccoli that is slightly past its prime but still perfectly safe to eat, you might not want to serve it raw on a vegetable platter. However, it is still incredibly delicious when used in cooked dishes. Here are some of the best culinary ways to minimize food waste and make the most of your broccoli:
1. Do Not Throw Away the Stems!
Many people discard the thick main stem of the broccoli, which is a tragedy. The inside of the stem is sweet, crunchy, and absolutely delicious. Use a vegetable peeler to shave away the tough, fibrous outer skin. Once you reach the pale green, tender core, you can:
- Slice it thinly to make a crunchy addition to stir-frys.
- Grate it to create a healthy, nutrient-packed broccoli slaw tossed with a light vinaigrette.
- Cut it into matchsticks and enjoy it raw with hummus or ranch dip.
2. Creamy Broccoli Soup
Slightly wilted or yellowing broccoli is perfect for pureed soups. Simmer the chopped stems and florets in vegetable or chicken broth with onions, garlic, and potatoes until tender. Blend everything together with a splash of cream or coconut milk and sharp cheddar cheese for a comforting, velvety soup that hides any cosmetic imperfections of the vegetable.
3. High-Heat Roasting
Roasting is the ultimate savior for slightly older vegetables. Toss your broccoli florets in olive oil, salt, pepper, and garlic powder, then spread them out on a baking sheet. Roast at a high temperature (400°F to 425°F) for 15 to 20 minutes until the edges are beautifully charred and caramelized. The intense dry heat cooks away any excess moisture and masks any slight bitterness with sweet, rich, roasted flavors.
—
Frequently Asked Questions (FAQs)
Can I store broccoli in aluminum foil?
Yes, wrapping your broccoli loosely in aluminum foil is a surprisingly effective storage method. The foil helps retain moisture while allowing ethylene gas to escape through the loose folds. However, the “bouquet” method (Method 1) and the damp paper towel wrap (Method 2) still rank higher for overall longevity and ease of use.
Should I wash broccoli in vinegar before storing it?
No. While a vinegar rinse is excellent for killing mold spores on berries, you should never wash broccoli before storing it. The dense, complex physical structure of broccoli florets makes it almost impossible to dry them completely afterward. Save the vinegar wash for immediately before you cook or eat the broccoli.
Why did my broccoli turn yellow in the fridge?
Yellowing is a natural sign of aging and decay. It occurs when the chlorophyll inside the flower buds breaks down. This process is accelerated by storing the broccoli in a warm environment, keeping it in an airtight plastic bag, or exposing it to ethylene-producing fruits like apples and bananas.
Does broccoli last longer whole or cut?
Whole broccoli lasts significantly longer than pre-cut florets. Cutting the vegetable damages its cells, increases its respiration rate, and exposes more surface area to air and potential bacterial contamination. If you want maximum shelf life, keep the head of broccoli whole until you are ready to cook it.
Is limp broccoli safe to eat?
Yes, limp broccoli is perfectly safe to eat as long as it does not display any other signs of spoilage, such as a bad smell, slimy texture, or mold growth. Limpness is simply a sign of water loss. You can easily restore its crisp texture using the ice bath hydration hack detailed above, or use it directly in soups, stews, or stir-frys.
—
Summary Table of Broccoli Storage Longevity
To wrap up, here is a quick reference table comparing the different storage methods and how long you can expect your broccoli to remain fresh and delicious using each technique:
| Storage Method | Expected Shelf Life | Best For |
|---|---|---|
| The Bouquet Method (Jar of Water) | 10 to 14 Days | Maximum freshness and long-term refrigeration of whole heads. |
| Damp Paper Towel Wrap | 7 to 10 Days | Refrigerators with limited vertical space or crowded crisper drawers. |
| Perforated Plastic Bag | 3 to 5 Days | Quick, hassle-free storage when cooking within a few days. |
| Airtight Container with Paper Towels | 4 to 6 Days | Pre-cut, washed, and prepped florets for fast weeknight meals. |
| Blanching & Freezing | 10 to 12 Months | Long-term preservation of excess grocery hauls or garden harvests. |
By applying these simple, scientifically proven storage techniques, you can put an end to slimy, yellowing broccoli, save money on your grocery bills, and significantly reduce your household food waste. Keep your produce fresh, treat your broccoli with care, and enjoy the delicious, crisp crunch of this incredible superfood in every single meal!
you can read also 26 Best Zucchini Recipes: Easy and Delicious Ideas