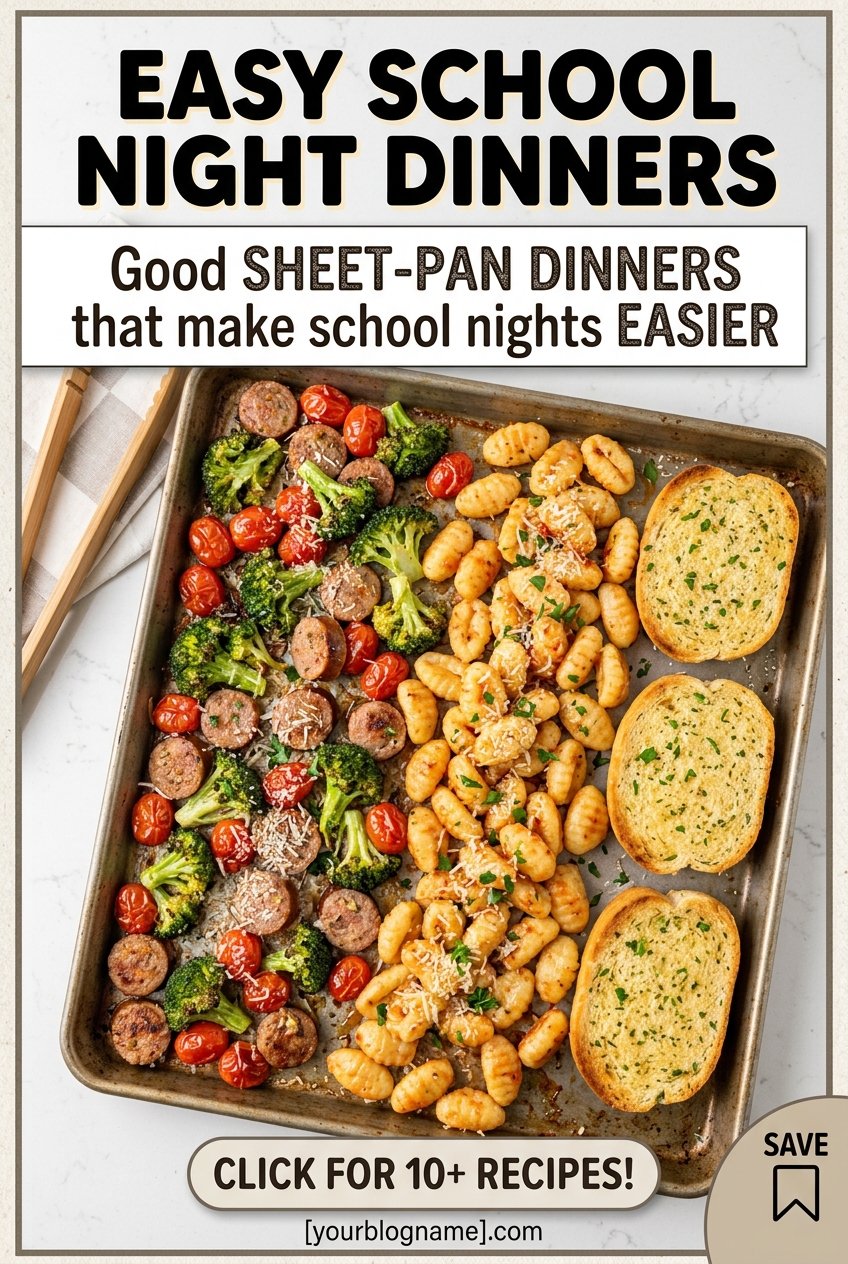
15-Minute Sheet-Pan Dinners: Easy, Low-Mess Gourmet Recipes
The modern kitchen is a battleground of conflicting desires. On one hand, we crave deeply flavorful, nutrient-dense, and restaurant-quality meals that nourish our bodies and delight our palates. On the other hand, the relentless pace of daily life leaves us with precious little energy to manage a sink overflowing with pots, pans, cutting boards, and prep bowls. This is where the culinary magic of easy sheet-pan dinners comes into play.
By utilizing a single piece of high-performance kitchen equipment—the humble rimmed baking sheet—you can roast, caramelize, and glaze an infinite variety of proteins and vegetables simultaneously. This comprehensive guide will transform the way you approach weeknight cooking. We will delve into the science of roasting, explore the essential tools needed for success, and provide step-by-step instructions for five gourmet, healthy sheet-pan meals, starting with our show-stopping, crowd-pleasing Pomegranate-Glazed Salmon.
—
The Science of Sheet-Pan Cooking: Why It Works
To consistently execute flawless low-effort weeknight recipes, it is vital to understand the thermodynamic principles at play inside your oven. Sheet-pan cooking relies heavily on two primary heat transfer methods: convection (the circulation of hot air around the food) and conduction (the direct transfer of heat from the hot metal pan to the food touching it).
When you roast ingredients on a flat, shallow surface, you allow maximum air circulation. Deep baking dishes trap moisture, creating a humid microclimate that steams your ingredients rather than roasting them. Steaming leads to soggy vegetables and pale, rubbery proteins. In contrast, a low-rimmed sheet pan allows moisture to evaporate rapidly, enabling the coveted Maillard reaction to occur. This chemical reaction between amino acids and reducing sugars is what produces the deeply savory, complex flavors and beautiful golden-brown crusts on roasted meats and vegetables.
Additionally, we must manage the thermal mass of our ingredients. Different foods require different times and temperatures to reach their peak culinary state. The secret to masterclass-level one-pan dinner ideas lies in understanding how to stage your ingredients, control your oven racks, and balance your moisture-to-fat ratios. We will dissect all of these elements below.
—
The Ultimate Sheet-Pan Buyer’s Guide: Tools for Success
Before diving into the recipes, we must address the foundation of this cooking style: the sheet pan itself. Not all baking sheets are created equal. Using the wrong pan can lead to warped metal, uneven cooking, and burnt food.
1. Material Composition: Aluminum is King
For optimal heat conduction, look for heavy-duty, 18-gauge natural aluminum pans. Aluminum heats up incredibly fast and cools down just as quickly, giving you precise control over the cooking process. Avoid thin, dark, or non-stick steel pans. Dark pans absorb heat too quickly, which often burns the bottom of your food before the interior is fully cooked.
2. The Half-Sheet Standard
The standard size for residential ovens is the “half-sheet pan,” which typically measures 18 by 13 inches with a 1-inch rim. This size provides ample surface area to spread out your ingredients, preventing overcrowding while still fitting comfortably in standard home ovens.
3. Rimmed vs. Rimless
Never use a rimless cookie sheet for savory sheet-pan dinners. The 1-inch rim is absolutely essential for containing rendered fats, juices, marinades, and oil, preventing dangerous oven fires and messy cleanups.
—
Showcase Recipe: Pomegranate-Glazed Salmon with Roasted Asparagus
This signature recipe elevates pomegranate-glazed salmon from a simple weeknight meal into a luxurious, sensory experience. The tart, sweet glaze cuts through the rich, healthy fats of the salmon, while the asparagus spears roast to tender-crisp perfection, absorbing the savory drippings on the pan.
The Culinary Chemistry of the Glaze
Our glaze relies on pomegranate molasses, a traditional Middle Eastern ingredient made by reducing pure pomegranate juice until it is thick, syrupy, and intensely tart. Pomegranate juice is rich in antioxidants, particularly polyphenols, which have been studied by institutions like Harvard Health for their cardiovascular and anti-inflammatory benefits. When combined with a touch of honey, soy sauce, garlic, and fresh ginger, this glaze caramelizes beautifully under the oven’s broiler, creating a sticky, deeply flavorful lacquer on the salmon.
Ingredient Checklist (Serves 4)
- Salmon: 4 center-cut, skin-on salmon fillets (approx. 6 ounces each), brought to room temperature.
- Asparagus: 1 large bunch of fresh asparagus, woody ends snapped off.
- Pomegranate Molasses: 3 tablespoons.
- Raw Honey: 1 tablespoon.
- Low-Sodium Soy Sauce (or Tamari): 1 tablespoon.
- Fresh Ginger: 1 teaspoon, finely grated on a microplane.
- Fresh Garlic: 2 cloves, minced.
- Extra-Virgin Olive Oil: 2 tablespoons (divided).
- Toasted Sesame Seeds & Fresh Pomegranate Arils: For garnish.
- Kosher Salt & Freshly Cracked Black Pepper: To taste.
Step-by-Step Cooking Instructions
Step 1: Prep and Preheat
Position your oven rack to the upper-middle position and preheat your oven to 400°F (204°C). For easy clean-up recipes, line your heavy-duty half-sheet pan with a sheet of high-quality parchment paper. Avoid aluminum foil here, as the natural sugars in the pomegranate glaze can stick to the foil and tear the delicate skin of the fish.
Step 2: Construct the Pomegranate Glaze
In a small saucepan over medium-low heat, combine the pomegranate molasses, honey, soy sauce, grated ginger, and minced garlic. Simmer gently for 3 to 4 minutes, stirring constantly, until the mixture reduces slightly and coats the back of a spoon. Remove from heat and set aside.
Step 3: Season the Asparagus
Place the prepped asparagus spears directly onto one half of the prepared sheet pan. Drizzle with 1.5 tablespoons of olive oil, and season generously with kosher salt and black pepper. Toss directly on the pan to ensure even coating, then arrange them in a single, uncrowded layer.
Step 4: Prep and Sear the Salmon
Pat the salmon fillets completely dry with paper towels. Removing surface moisture is critical; any remaining water will steam the fish, preventing the glaze from adhering and stopping the edges from crisping. Drizzle the remaining half-tablespoon of olive oil over the salmon skin and flesh, then season lightly with salt and pepper.
Step 5: Arrange and Bake
Place the salmon fillets skin-side down on the empty half of the sheet pan, leaving at least an inch of space between each fillet. Spoon half of the pomegranate glaze generously over the top of each salmon fillet, using a pastry brush to distribute it evenly.
Slide the pan into the preheated oven. Roast for 8 to 10 minutes, depending on the thickness of your fillets. The salmon should be slightly undercooked at this stage, and the asparagus should be bright green and starting to tenderize.
Step 6: Glaze and Broil
Remove the sheet pan from the oven and turn your oven’s broiler to HIGH. Brush the remaining pomegranate glaze over the salmon fillets. Return the pan to the oven under the broiler for 2 to 3 minutes. Keep a very close eye on the oven; the sugars in the glaze can go from beautifully caramelized to burnt in a matter of seconds. Remove once the glaze is bubbling, glossy, and slightly charred at the edges, and the salmon flakes easily with a fork.
According to the USDA Food Safety guidelines, salmon should reach an internal temperature of 145°F (63°C), though many culinary professionals prefer pulling it at 125°F to 130°F (51°C to 54°C) for a juicier, medium finish, letting it carryover cook while resting.
Step 7: Garnish and Serve
Transfer the salmon and asparagus to serving plates. Garnish the fish with a handful of bright, crunchy pomegranate arils and toasted sesame seeds for a brilliant texture contrast. Serve immediately.
—
Four More Gourmet Sheet-Pan Masterpieces
To truly master the art of the easy sheet-pan dinner, you must expand your repertoire across different proteins and flavor profiles. Below are four highly detailed, chef-developed recipes designed to maximize flavor while minimizing kitchen labor.
—
Recipe 2: Crispy Hot Honey Chicken Thighs with Roasted Brussels Sprouts
This recipe balances the earthy, sulfurous qualities of Brussels sprouts with the fiery sweetness of hot honey and the savory richness of skin-on, bone-in chicken thighs. The fat rendered from the chicken skin coats the sprouts, helping them roast to an incredible, chip-like crispness.
The Secret to Crispy Chicken Skin
The enemy of crispy skin is trapped moisture. We use bone-in, skin-on thighs because the bone acts as an insulator, keeping the meat incredibly juicy during high-heat roasting, while the skin crisps up. Salting the chicken skin ahead of time draws out deep-seated moisture via osmosis, allowing the skin to render its fat efficiently.
Ingredients (Serves 4)
- Chicken Thighs: 4 bone-in, skin-on chicken thighs (about 1.5 to 2 pounds total).
- Brussels Sprouts: 1.5 pounds, trimmed and halved lengthwise.
- Hot Honey: 3 tablespoons (purchased, or made by infusing honey with cayenne and chili flakes).
- Apple Cider Vinegar: 1 tablespoon.
- Smoked Paprika: 1 teaspoon.
- Garlic Powder: 1 teaspoon.
- Avocado Oil: 2 tablespoons (high smoke point is essential here).
- Kosher Salt & Black Pepper: To taste.
Step-by-Step Instructions
- Dry-Brine the Chicken: At least 30 minutes (or up to overnight in the fridge) before cooking, pat the chicken thighs completely dry. Season the skin generously with kosher salt, garlic powder, and smoked paprika. Leave uncovered in the refrigerator to allow the skin to dry out.
- Preheat and Prep: Preheat your oven to 425°F (218°C). Line your sheet pan with heavy-duty parchment paper.
- Season the Sprouts: In a medium bowl, toss the halved Brussels sprouts with the avocado oil, salt, and pepper. Ensure the flat, cut sides of the sprouts are well-coated with oil; this contact with the hot pan is what creates beautiful caramelization.
- Assemble the Pan: Place the chicken thighs skin-side up on the sheet pan, leaving space between them. Scatter the Brussels sprouts around the chicken, placing as many of them cut-side down on the baking sheet as possible.
- First Bake: Roast in the oven for 25 to 30 minutes. The chicken skin should start looking golden-brown, and the Brussels sprouts should be tender and deeply browned on their flat sides.
- Glaze and Finish: In a small bowl, whisk together the hot honey and apple cider vinegar. Carefully remove the sheet pan from the oven. Brush the hot honey mixture generously over the chicken thighs, and drizzle any remaining glaze over the Brussels sprouts. Toss the sprouts gently.
- The Crisping Phase: Return the pan to the oven and roast for an additional 5 to 7 minutes, until the chicken skin is incredibly crispy and lacquered, and the internal temperature of the chicken reaches 175°F (79°C). (While white meat is done at 165°F, dark meat chicken thighs are much more tender and flavorful when cooked to 175°F-185°F, as this higher temperature fully breaks down the collagen in the meat).
—
Recipe 3: Mediterranean Garlic-Herb Shrimp with Zucchini and Cherry Tomatoes
This recipe is an outstanding example of a healthy sheet-pan meal that takes under 20 minutes from start to finish. It leverages the naturally high water content of summer zucchini and cherry tomatoes, allowing them to blister and create a light, vibrant, garlicky pan sauce that coats the plump, tender shrimp.
Staging Ingredients with Fast-Cooking Proteins
Shrimp cooks incredibly fast—usually within 5 to 6 minutes at high heat. If we roasted the shrimp and vegetables at the same time, the shrimp would turn into rubbery, overcooked pucks by the time the tomatoes burst. To prevent this, we stage our cooking, roasting the vegetables first until they are caramelized, then adding the shrimp at the very end.
Ingredients (Serves 4)
- Shrimp: 1 pound large shrimp (16-20 count), peeled, deveined, and patted dry.
- Zucchini: 2 medium, cut into half-moons (about 1/2-inch thick).
- Cherry Tomatoes: 2 cups, left whole.
- Garlic: 4 cloves, thinly sliced.
- Dried Oregano & Thyme: 1 teaspoon each.
- Extra-Virgin Olive Oil: 3 tablespoons.
- Feta Cheese: 1/2 cup, crumbled.
- Fresh Lemon Juice and Zest: From 1 large lemon.
- Fresh Flat-Leaf Parsley: 1/4 cup, chopped.
Step-by-Step Instructions
- Preheat: Set your oven to 425°F (218°C).
- Roast the Veggies First: On your sheet pan, combine the zucchini half-moons, whole cherry tomatoes, and sliced garlic. Drizzle with 2 tablespoons of olive oil, the dried oregano, dried thyme, salt, and pepper. Toss to combine and spread in a single layer.
- Bake Stage 1: Roast for 12 to 14 minutes, until the tomatoes are plump and starting to blister, and the zucchini is tender.
- Prep the Shrimp: While the vegetables are roasting, toss your dried shrimp in a bowl with the remaining 1 tablespoon of olive oil, lemon zest, and a pinch of salt.
- Add the Shrimp and Feta: Carefully pull the sheet pan from the oven. Nestle the seasoned shrimp in among the vegetables. Sprinkle the crumbled feta cheese evenly over the entire pan.
- Bake Stage 2: Return the pan to the oven and roast for 5 to 7 minutes, just until the shrimp turn pink and opaque, and the feta starts to soften and brown slightly.
- Finish and Serve: Squeeze fresh lemon juice over the entire pan and garnish with fresh parsley. Serve hot, ideally with crusty rustic bread to soak up the incredible, garlic-infused tomato juices.
—
Recipe 4: Gochujang Glazed Pork Chops with Baby Bok Choy
For those craving bold, umami-rich flavors, this recipe delivers. Gochujang—a fermented Korean chili paste—brings a unique depth of flavor that is sweet, savory, smoky, and spicy all at once. Paired with baby bok choy, which wilts beautifully while maintaining a crisp, juicy stem, this is a fast track to a restaurant-caliber dinner.
The Anatomy of a Perfect Pork Chop
To prevent pork chops from drying out on a sheet pan, choose bone-in, thick-cut chops (at least 1 inch thick). Thin, boneless chops will overcook in minutes, losing all their moisture. The bone helps preserve juiciness and slows down the cooking process slightly, ensuring the glaze has time to caramelize.
Ingredients (Serves 2 to 4)
- Pork Chops: 2 to 4 thick-cut, bone-in pork chops.
- Baby Bok Choy: 4 to 6 heads, split lengthwise and thoroughly washed to remove grit.
- Gochujang Paste: 2 tablespoons.
- Toasted Sesame Oil: 2 tablespoons (divided).
- Mirin (Sweet Rice Wine): 2 tablespoons.
- Brown Sugar: 1 tablespoon.
- Toasted Sesame Seeds & Scallions: For garnish.
Step-by-Step Instructions
- Preheat and Prep: Preheat your oven to 400°F (204°C). Line your sheet pan with parchment.
- Make the Gochujang Glaze: In a small bowl, whisk together the Gochujang paste, 1 tablespoon of sesame oil, the mirin, and the brown sugar until smooth.
- Season and Sear: Pat the pork chops dry. Brush them generously on both sides with the Gochujang glaze, reserving about 1 tablespoon of the glaze for later. Place the chops on one half of the baking sheet.
- Prep the Bok Choy: In a bowl, toss the halved bok choy with the remaining 1 tablespoon of sesame oil, salt, and pepper. Place them cut-side down on the other half of the sheet pan.
- Roast: Bake for 15 to 18 minutes, flipping the pork chops halfway through. Brush the remaining glaze onto the chops after flipping.
- Check Temperature: Cook until the pork chops register an internal temperature of 140°F (60°C) on an instant-read thermometer. Remove from the oven and let them rest on a cutting board for 5 minutes (the temperature will rise to the safe and delicious mark of 145°F during this rest, locking in the juices).
- Serve: Plate the chops alongside the beautifully charred bok choy, and scatter sliced scallions and sesame seeds over the top.
—
Recipe 5: Crispy Sesame-Ginger Tofu with Broccoli and Bell Peppers
Sheet-pan cooking isn’t just for meat lovers. This vibrant, plant-based meal delivers crispy, satisfying protein alongside nutrient-dense vegetables. The key to this dish is unlocking the technique for making tofu genuinely crispy in a home oven without deep frying.
The Science of Crispy Baked Tofu
Tofu is packed with water. To make it crispy, we must do two things: press out the excess water and coat the exterior with cornstarch. The cornstarch acts as a moisture barrier; as the tofu bakes, the cornstarch absorbs the escaping moisture and dries out into a crispy, shatteringly light crust.
Ingredients (Serves 4)
- Tofu: 1 block extra-firm tofu, pressed and cut into 3/4-inch cubes.
- Broccoli: 1 large head, cut into bite-sized florets.
- Red Bell Pepper: 1 large, sliced into strips.
- Cornstarch: 1.5 tablespoons.
- Soy Sauce (or Tamari): 2 tablespoons.
- Maple Syrup: 1 tablespoon.
- Toasted Sesame Oil: 2 tablespoons (divided).
- Garlic Powder & Ground Ginger: 1/2 teaspoon each.
Step-by-Step Instructions
- Press the Tofu: Wrap the block of tofu in a clean kitchen towel or paper towels. Place a heavy skillet or canned goods on top and let it press for 15 to 20 minutes. Cut into cubes.
- Preheat: Preheat your oven to 400°F (204°C).
- Coat the Tofu: In a medium bowl, toss the tofu cubes with 1 tablespoon of sesame oil and 1 tablespoon of soy sauce. Sprinkle the cornstarch over the tofu and toss gently until every cube is evenly coated in a thin, chalky layer.
- Prep the Veggies: In another bowl, toss the broccoli florets and sliced bell pepper with the remaining 1 tablespoon of sesame oil, the garlic powder, and ground ginger.
- Arrange the Pan: Spread the coated tofu cubes on one side of the pan, making sure they do not touch each other (touching blocks will steam, not crisp). Spread the vegetables on the other side of the pan.
- Bake: Roast for 25 to 30 minutes, flipping the tofu cubes and tossing the vegetables halfway through, until the tofu is golden and crispy on the edges, and the broccoli florets are tender with charred, crispy tips.
- Glaze: In a small bowl, whisk the remaining 1 tablespoon of soy sauce and 1 tablespoon of maple syrup. Drizzle this mixture over the hot tofu and veggies immediately after pulling them from the oven, tossing gently to coat. Serve over brown rice or quinoa.
—
7 Golden Rules for Foolproof Sheet-Pan Success
Even with excellent recipes, minor mistakes can derail a sheet-pan dinner. Memorize these seven professional rules to ensure consistently exceptional results:
| Rule | The Action | Why It Matters |
|---|---|---|
| 1. Cut Uniformly | Chop all similar vegetables to the exact same size. | Ensures all ingredients cook at the same rate, preventing undercooked or burnt pieces. |
| 2. Avoid Overcrowding | Leave breathing room (at least 1/4 inch) between ingredients. | Crowding traps steam, turning a dry roast into a soggy boil. Use two pans if necessary. |
| 3. Coat with Fat | Always toss ingredients thoroughly in oil before roasting. | Oil acts as a heat conductor, distributing heat evenly and promoting deep caramelization. |
| 4. Stage Cooking Times | Add quick-cooking ingredients later in the roasting process. | Prevents delicate items (like seafood or spinach) from overcooking while waiting for denser items (like potatoes). |
| 5. Position Wisely | Place denser vegetables near the edges of the pan and proteins in the center. | The edges of a sheet pan get hotter than the center; placing dense items there speeds up their cooking. |
| 6. Utilize High Heat | Roast at temperatures between 400°F and 450°F (204°C to 232°C). | High heat caramelizes the exterior of foods quickly without drying out their interior. |
| 7. Finish with Acid | Always add a squeeze of fresh lemon, lime, or a splash of vinegar just before serving. | Brightens up the heavy, roasted flavors and balances out the richness of caramelized fats. |
—
The Ultimate Clean-Up Philosophy: True Zero-Mess Hacks
The primary appeal of easy sheet-pan dinners is the minimal cleanup. However, if you don’t prep your pan correctly, you can still end up scrubbing baked-on grease for hours. Follow these tips for a truly effortless post-dinner cleanup:
Parchment Paper vs. Aluminum Foil
While both offer protection, they serve different purposes. Parchment paper is naturally non-stick and is perfect for baking fish, tofu, and sugary glazes. However, it cannot be used under the broiler, as it can catch fire. Heavy-duty aluminum foil is excellent for high-heat roasting, broiling, and catching rendered fats from meats. For the ultimate protection, double-wrap your pan in foil, making sure it goes up and over the rims.
Silicone Baking Mats (Silpat)
These are incredibly durable, environmentally friendly, and naturally non-stick. They are perfect for roasting vegetables and baking proteins. The only downside is that they absorb some heat, which can slightly reduce the crispiness of roasted potatoes or chicken skin compared to direct contact with the metal pan or parchment paper.
The Deglazing Trick for Stuck-On Food
If you do end up with a burnt, caramelized mess on your bare aluminum pan, do not scrub it immediately. Instead, pour a cup of water into the pan, add a tablespoon of baking soda, and place the pan across two stove burners. Bring the water to a simmer over medium heat for 5 minutes. The heat and baking soda will lift the burnt food right off the metal, allowing you to wipe it clean with a soft sponge.
—
Meal Prep and Smart Storage Strategies
One-pan dinners are incredible tools for weekend meal prep. Because the ingredients are already portioned and cooked together, they store beautifully and reheat with ease.
How to Store
Allow your sheet-pan meals to cool completely to room temperature before packing them away. Storing hot food in sealed containers creates condensation, which will make your crispy chicken skin or roasted broccoli soggy. Store in airtight glass containers in the refrigerator for up to 4 days.
How to Reheat (Without Turning Food to Rubber)
While the microwave is convenient, it ruins the texture of roasted foods. For the best results, reheat your meals back on a sheet pan in a 350°F (177°C) oven for 8 to 10 minutes, or in an air fryer at 360°F (182°C) for 3 to 4 minutes. This restores the crispy exterior of your proteins and vegetables while keeping them moist inside.
—
Conclusion: Elevate Your Dinner Routine
Transitioning to sheet-pan cooking isn’t just about saving time; it’s about reclaiming your evening without sacrificing the quality of your food. By masterfully combining science, high-quality tools, and proper culinary techniques, you can turn simple, whole ingredients into luxurious, healthy, and deeply satisfying meals with almost no cleanup required.
Whether you begin with our luxurious, sweet-and-tangy pomegranate-glazed salmon, or opt for the fiery crunch of hot honey chicken thighs, these recipes will quickly become staples in your weekly culinary rotation. Dust off your half-sheet pan, preheat your oven, and enjoy the art of effortless, gourmet dining tonight!