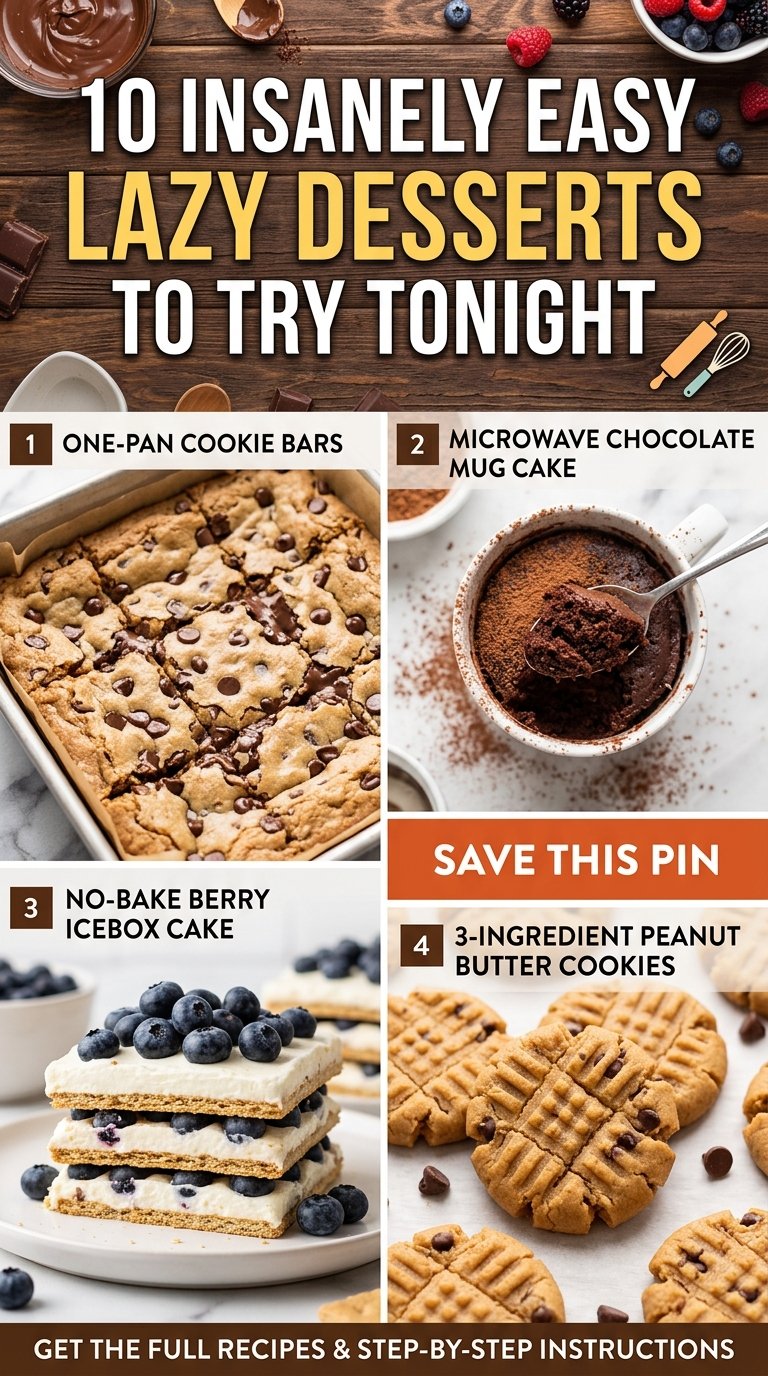
10 Insanely Easy Lazy Desserts to Try Tonight
We have all been there: it is late in the evening, your cravings are kicking in, and you are desperately seeking a delicious sweet treat. However, the thought of spending hours measuring out dry ingredients, chilling dough, rolling out pastry, and scrubbing dirty mixing bowls is enough to make you give up entirely. You do not need a culinary degree or a whole afternoon to satisfy your sweet tooth. What you need is a collection of dependable, high-quality, and incredibly satisfying lazy desserts that deliver maximum flavor with minimal effort.
When you want to indulge without the hassle of traditional baking, these simple creations are your ultimate solution. From a warm, gooey scoopable cookie casserole to an ultra-melty, dip-worthy s’mores dip, we have compiled the ultimate list of ten effortless desserts designed for busy nights. These recipes require very few ingredients, use basic pantry staples, and require almost zero cleanup. Let us dive deep into the world of effortless baking and discover how you can whip up restaurant-quality desserts in a matter of minutes.
Why Lazy Desserts Are the Ultimate Comfort Food
There is a unique science behind why we crave simple, warm desserts. When stress levels are high or physical energy is low, our bodies naturally seek out quick carbohydrates and comfort foods. However, the process of complex baking can actually raise cortisol levels if recipes do not go planned. This is where lazy desserts come to the rescue. They strip away the precision, anxiety, and high barrier to entry associated with traditional pastry arts, replacing them with forgiving ratios, fast cook times, and highly rewarding textures.
These quick sweet treats focus heavily on sensory satisfaction: warm chocolate, melted marshmallows, buttery crusts, and soft, gooey centers. By skipping tedious steps like dough chilling or precise flour leveling, you focus entirely on the joy of eating. Moreover, many of these recipes are designed to be customizable. If you do not have chocolate chips, you can easily swap in chopped candy bars, peanut butter, or dried fruit. This versatility makes lazy desserts the absolute king of home comfort foods.
Essential Pantry Staples for Effortless Baking
To pull off these easy dessert recipes at a moment’s notice, you should keep your pantry and refrigerator stocked with a few key ingredients. When you have these basics on hand, you will never have to make a late-night grocery store run to satisfy your sugar cravings.
- All-Purpose Flour & Cake Mixes: A box of yellow, white, or devil’s food cake mix is the ultimate shortcut for cobblers, dump cakes, and quick bars.
- Unsalted Butter: Butter adds richness, moisture, and that unmistakable home-baked flavor. Keep a few sticks in your freezer so you are always prepared.
- Sweetened Condensed Milk: This thick, sweet ingredient is the secret weapon behind quick fudges, pie fillings, and no-churn ice creams.
- Chocolate Chips & Melting Wafers: Whether semi-sweet, dark, milk, or white chocolate, having chocolate on hand allows you to create rich bases and toppings instantly.
- Marshmallows: Perfect for broiling, melting into dips, or folding into quick cereal bars.
- Prepared Doughs: Store-bought puff pastry sheets, crescent rolls, and pre-made cookie dough are incredible time-savers that elevate any lazy baking project.
The 10 Best Lazy Desserts You Need to Make Right Now
Here is our definitive list of ten incredible, highly satisfying, and wonderfully simple dessert recipes. Each option has been thoroughly tested to ensure it delivers exceptional results with the absolute minimum amount of effort.
1. Scoopable Cookie Casserole
If you love the warm, underbaked centers of freshly baked chocolate chip cookies, this scoopable cookie casserole will change your life. Instead of portioning out individual dough balls, chilling them, and baking multiple batches on baking sheets, you simply spread a rich, buttery cookie batter directly into a single casserole dish and bake it until the edges are golden and the center remains beautifully soft and gooey.
Why It Works: By baking the cookie dough as a single large unit, the heat penetrates the edges while keeping the center incredibly soft, warm, and melt-in-your-mouth tender. It completely eliminates the risk of dry, overbaked cookies.
Ingredients:
- 1/2 cup unsalted butter, melted and slightly cooled
- 1/2 cup granulated sugar
- 1/2 cup packed light brown sugar
- 1 large egg (at room temperature)
- 1 teaspoon pure vanilla extract
- 1 cup all-purpose flour
- 1/2 teaspoon baking soda
- 1/4 teaspoon fine sea salt
- 1 cup semi-sweet chocolate chips (plus extra for sprinkling on top)
Step-by-Step Instructions:
- Preheat your oven to 350°F (175°C) and lightly grease an 8×8-inch baking dish or a small cast-iron skillet with butter or non-stick cooking spray.
- In a medium mixing bowl, whisk together the melted butter, granulated white sugar, and brown sugar until smooth and completely combined.
- Add the egg and vanilla extract to the sugar mixture, whisking vigorously for about one minute until the mixture becomes slightly pale and thickened.
- Gently fold in the all-purpose flour, baking soda, and sea salt using a spatula. Mix just until the flour disappears to avoid overworking the gluten, which can make the casserole tough.
- Fold in the chocolate chips, saving a small handful to press into the top.
- Spread the thick batter evenly into your prepared baking dish. Press the remaining chocolate chips on top for a beautiful, bakery-style finish.
- Bake for 18 to 22 minutes. The edges should be set and lightly browned, but the center should still have a slight jiggle when gently shaken.
- Remove from the oven and let cool for 5 minutes. Serve warm by scooping large portions directly into bowls, topped with a generous scoop of vanilla bean ice cream.
2. 5-Minute Oven S’Mores Dip
You do not need an open campfire to enjoy the classic, nostalgic combination of toasted marshmallows, melted chocolate, and crunchy graham crackers. This oven-baked skillet s’mores dip is incredibly easy to assemble and serves as a highly interactive, crowd-pleasing dessert that is ready in under ten minutes.
Why It Works: Using a cast-iron skillet or oven-safe baking dish allows the chocolate to melt uniformly from the bottom heat, while the broiler perfectly browns and caramelizes the marshmallow tops, creating that signature campfire texture.
Ingredients:
- 1.5 cups high-quality chocolate chips or chopped chocolate bars (milk chocolate is classic, but dark chocolate balances the sweetness perfectly)
- 1 bag (10 ounces) of regular-sized marshmallows, halved crosswise for optimal coverage
- 1 box of graham crackers, waffle cookies, or pretzels for dipping
Step-by-Step Instructions:
- Preheat your oven’s broiler to high, or preheat your oven to 450°F (230°C) if your broiler is uncomfortably strong or uneven.
- Take an 8-inch cast-iron skillet or an oven-safe pie dish and layer the bottom completely with your chocolate chips or chopped chocolate pieces. Ensure the layer is even and covers the entire base.
- Arrange the marshmallow halves cut-side-down directly on top of the chocolate layer. Pack them tightly together so that no chocolate is visible underneath.
- Place the skillet in the oven on the middle rack. Watch it constantly—marshmallows can burn in a matter of seconds under a hot broiler!
- Bake for 3 to 5 minutes, or until the marshmallow tops are puffed up, toasted, and a beautiful deep golden brown.
- Carefully remove the hot skillet from the oven using an oven mitt. Let it sit for 2 minutes to allow the chocolate underneath to finish melting completely from the residual heat of the skillet.
- Serve immediately alongside graham crackers, pretzels, or fresh fruit slices for dipping directly into the warm, gooey layers.
3. No-Bake Peanut Butter Bars
When even turning on the oven feels like too much work, these rich, velvety, no-bake peanut butter bars are your saving grace. Tasting remarkably similar to a giant, homemade peanut butter cup, this recipe requires just five basic pantry ingredients and absolutely zero cooking time.
Why It Works: Mixing melted butter with graham cracker crumbs creates a sturdy, delicious crust that sets beautifully in the refrigerator. Paired with sweet powdered sugar and creamy peanut butter, it forms a rich layer that contrasts beautifully with a smooth chocolate ganache top.
Ingredients:
- 1 cup unsalted butter, melted
- 2 cups graham cracker crumbs (about 12-14 full sheets crushed)
- 2 cups powdered sugar
- 1.5 cups creamy peanut butter (avoid natural peanut butter that separates, as it can make the bars oily)
- 1.5 cups semi-sweet or milk chocolate chips
- 2 tablespoons additional peanut butter (for melting with the chocolate)
Step-by-Step Instructions:
- Line a 9×13-inch baking dish with parchment paper, leaving an overhang on the sides to easily lift the bars out later.
- In a large bowl, stir together the melted butter, crushed graham cracker crumbs, powdered sugar, and 1.5 cups of creamy peanut butter until the mixture is smooth and completely combined.
- Press the peanut butter mixture firmly and evenly into the bottom of your prepared baking dish. Use the flat bottom of a drinking glass to smooth it out into a tight, level layer.
- In a microwave-safe bowl, combine the chocolate chips and the remaining 2 tablespoons of peanut butter. Microwave in 30-second intervals, stirring in between, until the chocolate is completely melted and glossy.
- Pour the warm chocolate mixture over the peanut butter base, using an offset spatula to spread it into an even, smooth layer.
- Place the baking dish in the refrigerator for at least 1 hour, or until the chocolate top has completely set.
- Use the parchment paper overhang to lift the bars out of the dish. Cut into squares using a warm, sharp knife and serve chilled.
4. 3-Ingredient Cake Mix Cobbler (The Classic Dump Cake)
The term “dump cake” might not sound incredibly elegant, but this 3-ingredient cake mix cobbler is one of the most brilliant, delicious, and low-effort desserts ever invented. By layering canned fruit filling, dry yellow cake mix, and sliced butter, you create a bubbly, bubbling fruit cobbler with a golden, buttery, biscuit-like topping without ever picking up a whisk.
Why It Works: As the dessert bakes, the juices from the fruit bubble up and hydrate the lower layer of dry cake mix, while the melting butter on top bakes the dry flour into a rich, sweet, crumbly crust.
Ingredients:
- 2 cans (21 ounces each) of cherry, peach, or apple pie filling
- 1 box (15.25 ounces) of standard yellow or white cake mix
- 3/4 cup (1.5 sticks) of cold unsalted butter, cut into thin, even slices
Step-by-Step Instructions:
- Preheat your oven to 350°F (175°C) and grease a 9×13-inch baking dish.
- Pour both cans of fruit pie filling directly into the bottom of the baking dish, spreading them out with a spoon to create an even layer of fruit.
- Empty the dry cake mix evenly over the fruit layer. Use your hands or a fork to gently distribute it, making sure it covers all of the fruit. Do not stir!
- Arrange the thin slices of cold butter in a grid pattern across the top of the dry cake mix, attempting to cover as much of the dry flour surface as possible.
- Bake in the preheated oven for 45 to 50 minutes. The top should be deeply golden and crunchy, and the fruit filling should be bubbling up along the sides.
- Let cool for 10 minutes before serving. This allows the fruit juices to thicken slightly. Serve warm with whipped cream or vanilla ice cream.
5. 5-Minute Chocolate Mug Cake
When you are craving a single serving of warm, rich cake and want it within the next five minutes, the microwave mug cake is the ultimate solution. This recipe avoids the rubbery texture common in microwave baking by omitting the egg, resulting in a incredibly moist, fluffy, and deeply chocolatey cake that cooks in just 60 seconds.
Why It Works: Omitting the egg prevents the cake from developing a spongy, rubbery texture in the microwave. Instead, a touch of vegetable oil and baking powder creates a light, airy crumb that resembles a traditional baked chocolate cake.
Ingredients:
- 4 tablespoons all-purpose flour
- 3 tablespoons granulated sugar
- 2 tablespoons unsweetened cocoa powder
- 1/2 teaspoon baking powder
- A pinch of fine salt
- 3 tablespoons whole milk (or any plant-based milk)
- 1 tablespoon melted butter or neutral vegetable oil
- 1 tablespoon water
- 1 tablespoon chocolate chips or a small chocolate truffle (for a molten core)
Step-by-Step Instructions:
- In a standard 12-ounce microwave-safe ceramic mug, whisk together the dry ingredients: flour, sugar, cocoa powder, baking powder, and salt using a small fork or whisk.
- Add the wet ingredients: milk, melted butter (or oil), and water to the mug. Stir vigorously until a smooth, thick batter forms, making sure to scrape the bottom corners of the mug where dry flour loves to hide.
- Drop the tablespoon of chocolate chips or your chocolate truffle directly into the center of the batter. Do not stir them in; just let them sink slightly into the middle.
- Microwave on high power for 60 to 70 seconds (based on a 1000-watt microwave). The cake should rise up beautifully and look dry on the top surface, but still slightly shiny in the very center.
- Let the mug cake cool for 2 minutes before eating—it will be extremely hot! Dust with powdered sugar or top with a spoonful of heavy cream.
6. Lazy Day Puff Pastry Apple Tarts
If you want a dessert that looks like it came straight from a high-end French bakery but requires less than fifteen minutes of preparation, store-bought frozen puff pastry is your best friend. These rustic apple tarts are crispy, buttery, caramelized, and incredibly simple to put together.
Why It Works: Frozen puff pastry does all the heavy lifting here, rising into thousands of flaky layers in the oven. Brushing the apples with melted butter and sugar creates a naturally glossy, caramelized glaze as they bake.
Ingredients:
- 1 sheet of frozen puff pastry, thawed according to package instructions
- 2 medium honeycrisp or granny smith apples, cored and sliced very thinly
- 2 tablespoons unsalted butter, melted
- 2 tablespoons granulated sugar mixed with 1/2 teaspoon ground cinnamon
- 1/4 cup apricot preserves or honey (for glazing)
Step-by-Step Instructions:
- Preheat your oven to 400°F (200°C) and line a large baking sheet with parchment paper.
- Unroll the thawed puff pastry sheet onto the parchment paper. Cut it into four equal-sized squares.
- Using a sharp knife, lightly score a 1/2-inch border around the edge of each square (do not cut all the way through). This creates a frame that will rise beautifully around the apples.
- Arrange the thin apple slices inside the scored border of each pastry square, overlapping them slightly like shingles.
- Brush the apple slices and the exposed pastry borders generously with the melted butter.
- Sprinkle the cinnamon-sugar mixture evenly over the apples on each tart.
- Bake for 18 to 20 minutes, or until the pastry borders have puffed up high and are a deep golden brown.
- While the tarts are hot, warm the apricot preserves or honey in the microwave for 15 seconds, then gently brush it over the warm apples to create a stunning, shiny glaze. Serve warm.
7. Creamy No-Churn Vanilla Ice Cream
Making homemade ice cream usually requires an expensive, heavy ice cream maker that takes up cabinet space and requires you to freeze a bowl 24 hours in advance. This no-churn method bypasses all of that equipment, using a simple whipping technique to create incredibly creamy, velvety ice cream that never gets icy.
Why It Works: Whipping heavy cream incorporates millions of tiny air bubbles that mimic the churning process of an ice cream machine. Folding in sweetened condensed milk provides the perfect sugar-to-water ratio, preventing large ice crystals from forming during the freezing process.
Ingredients:
- 2 cups heavy whipping cream, cold
- 1 can (14 ounces) sweetened condensed milk, chilled
- 1 tablespoon pure vanilla extract or vanilla bean paste
- Optional: 1 cup of chocolate chips, crushed cookies, or caramel swirls
Step-by-Step Instructions:
- In a large, chilled metal or glass mixing bowl, whip the cold heavy cream using a hand mixer or stand mixer on high speed until stiff peaks form. (The cream should hold its shape firmly when you lift the beaters).
- In a separate medium bowl, whisk together the chilled sweetened condensed milk, vanilla extract, and a pinch of salt until smooth.
- Gently fold one-third of the whipped cream into the sweetened condensed milk mixture to lighten it.
- Pour the lightened mixture back into the remaining whipped cream. Using a rubber spatula, gently fold the two mixtures together until completely combined. Be careful not to deflate the air you whipped into the cream.
- If you are adding mix-ins like crushed cookies or chocolate chips, gently fold them in during the final stages of mixing.
- Pour the ice cream mixture into a standard 9×5-inch metal loaf pan or an airtight container. Smooth the top with a spatula.
- Cover the surface of the ice cream directly with plastic wrap to prevent ice crystals from forming, then wrap the entire pan tightly.
- Freeze for at least 6 hours, or overnight, until firm. Scoop and serve directly from the freezer.
8. Sheet Pan Chocolate Chip Cookie Bars
When you need to feed a crowd but do not want to spend hours scooping dough, sheet pan cookie bars are the ultimate baking shortcut. You get all the buttery, chocolatey goodness of classic chocolate chip cookies in a fraction of the time.
Why It Works: Baking cookie dough in a large sheet pan cooks the entire batch simultaneously, yielding bars with crisp edges and incredibly soft, chewy, cookie-dough-like centers.
Ingredients:
- 1 cup (2 sticks) unsalted butter, softened to room temperature
- 3/4 cup granulated sugar
- 3/4 cup packed dark brown sugar
- 2 large eggs
- 2 teaspoons pure vanilla extract
- 2.25 cups all-purpose flour
- 1 teaspoon baking soda
- 1 teaspoon salt
- 2 cups semi-sweet chocolate chips
Step-by-Step Instructions:
- Preheat your oven to 375°F (190°C) and grease a 10×15-inch jelly roll pan or baking sheet.
- In a large bowl, cream together the softened butter, granulated sugar, and dark brown sugar with a hand mixer until light and fluffy (about 2 minutes).
- Beat in the eggs one at a time, then stir in the vanilla extract until fully incorporated.
- In a separate bowl, whisk together the flour, baking soda, and salt. Gradually add this dry mixture to the wet ingredients, mixing on low speed just until combined.
- Fold in the chocolate chips with a spatula.
- Drop spoonfuls of the dough all over the prepared baking sheet, then use a piece of plastic wrap or a spatula to press and smooth the dough into a single, flat, even layer across the entire pan.
- Bake for 18 to 22 minutes, or until the top is a beautiful golden brown.
- Allow the bars to cool completely in the pan before slicing into squares. Store in an airtight container to keep them soft for days.
9. 3-Ingredient Nutella Brownies
Nutella is a magic ingredient in the baking world. Because it already contains cocoa, sugar, fats, and emulsifiers, it acts as the perfect base for rich, fudgy, decadent brownies without needing a dozen separate ingredients.
Why It Works: The high fat and sugar content in Nutella, when combined with eggs and a small amount of flour, bakes into a dense, fudgy brownie with a beautifully shiny, crinkly top crust.
Ingredients:
- 1.25 cups Nutella (or any hazelnut cocoa spread)
- 2 large eggs
- 1/2 cup all-purpose flour
- Optional: A pinch of flaky sea salt for sprinkling on top
Step-by-Step Instructions:
- Preheat your oven to 350°F (175°C) and line an 8×8-inch baking dish with parchment paper, leaving an overhang for easy removal.
- In a medium bowl, combine the Nutella and the two eggs. Whisk them together vigorously until the mixture is completely smooth and slightly shiny.
- Add the all-purpose flour to the bowl and fold it in using a rubber spatula. Mix just until the flour is completely incorporated and no dry streaks remain (do not overmix, or the brownies will become cakey rather than fudgy).
- Spread the thick batter evenly into your prepared baking dish, smoothing the top with your spatula.
- If using, sprinkle a generous pinch of flaky sea salt across the top of the batter.
- Bake for 15 to 18 minutes. A toothpick inserted into the center should come out with a few moist crumbs attached—do not overbake, or they will lose their signature fudgy texture.
- Let the brownies cool in the pan for 10 minutes, then lift them out using the parchment paper and slice into rich, decadent squares.
10. Warm Cinnamon Fried Apples
If you love the warm, spiced filling of an apple pie but do not want to deal with making pastry crust, warm cinnamon fried apples are the perfect rustic solution. This dessert is cooked entirely on the stovetop in a single pan and is ready in under 15 minutes.
Why It Works: Sautéing apples in butter softens their fibers, while brown sugar and cinnamon melt with the apple juices to form a rich, spiced caramel sauce that coats every single slice.
Ingredients:
- 4 large apples (such as Honeycrisp, Gala, or Fuji), cored and sliced into 1/4-inch wedges
- 2 tablespoons unsalted butter
- 2 tablespoons brown sugar
- 1 teaspoon ground cinnamon
- 1/4 teaspoon ground nutmeg
- 1 tablespoon water or apple cider
- 1 teaspoon cornstarch dissolved in 1 tablespoon cold water (optional, for a thicker sauce)
Step-by-Step Instructions:
- Melt the butter in a large skillet over medium heat.
- Add the apple slices to the skillet and sauté them for about 5 minutes, stirring occasionally, until they start to soften slightly and turn translucent.
- Sprinkle the brown sugar, cinnamon, nutmeg, and water (or apple cider) over the apples. Stir well to coat all of the slices evenly.
- Reduce the heat to low, cover the skillet with a lid, and let the apples simmer for 5 to 7 minutes, or until they are tender when poked with a fork.
- If you prefer a thick, syrupy glaze, stir in the cornstarch slurry and cook for an additional minute, stirring constantly, until the sauce bubbles and thickens.
- Serve warm directly from the pan, spooned generously over vanilla ice cream, pound cake, or warm waffles.
Top Tips for Making Quick Sweet Treats Taste Gourmet
Just because a dessert is lazy does not mean it has to taste basic. With a few simple culinary tricks, you can elevate these quick sweet treats into dessert-menu-worthy creations that will impress anyone who tastes them.
1. Always Add Salt
The single biggest mistake home bakers make with simple desserts is omitting salt. Salt is not just for savory dishes; it acts as a flavor enhancer that cuts through intense sweetness, balances rich fats, and highlights the complex notes of chocolate and vanilla. Always add a pinch of fine sea salt to your batters, or sprinkle flaky sea salt (like Maldon) over the top of baked goods right as they come out of the oven.
2. Brown Your Butter
If a recipe calls for melted butter, take an extra three minutes to brown it on the stovetop first. Simply melt the butter over medium heat, swirling the pan occasionally, until it foams, turns a rich amber color, and smells incredibly nutty. Brown butter adds a massive depth of caramelized, complex flavor to cookies, blondies, and cake mixes that instantly elevates them from simple to gourmet.
3. Temperature Play
The contrast between hot and cold is one of the most powerful tools in pastry arts. Serving a warm, fresh-out-of-the-oven scoopable cookie casserole or warm cinnamon apples with ice-cold vanilla ice cream or chilled whipped cream creates an incredible sensory experience that makes any lazy dessert feel like an upscale restaurant treat.
Dietary Adaptations for Lazy Baking
One of the best things about simple recipes is how easily they can be adapted to accommodate different dietary needs and preferences without adding complexity to the preparation process.
| Dietary Need | Simple Substitution | Best For |
|---|---|---|
| Gluten-Free | Use a 1:1 gluten-free baking flour blend (like Cup4Cup or King Arthur) in place of all-purpose flour. | Cookie Casseroles, Mug Cakes, and Brownies |
| Dairy-Free | Swap traditional butter for refined coconut oil or vegan butter sticks, and use almond or oat milk. | Mug Cakes, Fried Apples, and S’mores Dip |
| Egg-Free | Use a “flax egg” (1 tbsp ground flaxseed mixed with 3 tbsp water) or applesauce (1/4 cup per egg). | Cookie Casseroles and Sheet Pan Cookie Bars |
Frequently Asked Questions About Easy Desserts
Can I make these lazy desserts ahead of time?
Many of these recipes, such as the no-bake peanut butter bars and no-churn vanilla ice cream, are actually designed to be made ahead of time because they require chilling or freezing to set properly. For warm desserts like the scoopable cookie casserole or the s’mores dip, it is highly recommended to bake and serve them immediately to enjoy their gooey, melted textures. However, you can easily prepare the batters or assemble the ingredients ahead of time and keep them chilled in the refrigerator until you are ready to bake.
What is the secret to keeping mug cakes from turning rubbery?
The secret is omitting the egg! Eggs contain proteins that coagulate quickly under microwave radiation, turning a light cake batter into a tough, spongy, rubbery mass. By leaving the egg out and relying on a touch of baking powder and oil for rise and moisture, you get a much lighter, fluffier crumb that mimics a traditional oven-baked cake.
Can I use natural peanut butter for the no-bake bars?
It is best to avoid natural peanut butters that require stirring and have oil separation. The natural oils can prevent the bars from setting properly, leading to a greasy or crumbly texture. Traditional, emulsified creamy peanut butters work best because they contain stabilized fats that solidify when chilled, holding the graham cracker crust together beautifully.
How do I store leftover cookie casserole?
If you happen to have any leftovers of the scoopable cookie casserole, cover the dish tightly with plastic wrap or transfer the leftovers to an airtight container. Store at room temperature for up to 3 days. To enjoy that fresh-baked, gooey texture again, simply pop a portion in the microwave for 15 to 20 seconds before serving.
Can I use frozen fruit for the cake mix cobbler?
Yes! You can easily substitute frozen berries, peaches, or cherries for the canned pie filling. However, because frozen fruit contains more natural water and less sugar than canned filling, you should toss the frozen fruit with 1/4 cup of sugar and 1 tablespoon of cornstarch before putting it in the baking dish to ensure the juices thicken properly into a beautiful, bubbly sauce.
Conclusion: Your Next Sweet Craving Solved
You do not need to spend hours in the kitchen, create a mountain of dirty dishes, or master complex baking techniques to enjoy a truly spectacular dessert. The beauty of these ten lazy desserts lies in their simplicity, speed, and incredible flavor profiles. Whether you are baking a warm, gooey scoopable cookie casserole for a cozy movie night, or whipping up a 5-minute chocolate mug cake after a long workday, these recipes prove that sometimes, the simplest path to sweetness is also the most delicious.
Keep your pantry stocked with the essentials, remember to add that crucial pinch of salt, and never underestimate the power of a quick, warm, comforting sweet treat. Happy (lazy) baking!